
Newsletter editor - customisation
Here are a couple of ways to add the personal touch to your newsletter and make it a more appealing read for the recipient.
In this article:
🙋♂️ What is a merge tag?
A merge tag is basically a piece of code that serves as a placeholder, for example fName which is 'first name' and lName, which is 'last name'. When these merge tags are used in the correct place, i.e: Hi fName lName, Hivepass will recognise that the email address rocketron24+kmtbc@gmail.com belongs to a user called Dave Kiwi, so when this user is sent an email campaign, the email that arrives in their inbox will automatically include their first and last names.

🏷️ How to add a merge tag
To personalise the email by adding a first name and/or last name merge tag to the intro copy of the email, place the cursor in the appropriate place and go to the Text Block to the right and use the drop down arrow to bring up the menu of merge tags. Select the one you want.

☝️ You will not see the correct first name and/or last name filled in when you preview the email or send a test email.
Merge tags can be really helpful for adding links into your newsletter that pull the information directly from Hivepass. Meaning that you don’t need to enter a url or other information. With one click you can add a merge tag that will allow the user to click through to your website, social pages etc.
💡Tip: Merge tags use the data set up in the Hivepass system. For your url or social links, make sure these are set up first. See related article: Newsletter editor - the essentials
💬 Preheader text
The preheader text is the couple of lines of copy that show in your recipients email inbox before they have opened the email. It serves as a synopsis of the email as a whole and you can use this copy to grab attention or highlight particular content in the newsletter.
An eye-catching preheader really helps with email open rates - just remember to keep it really brief!
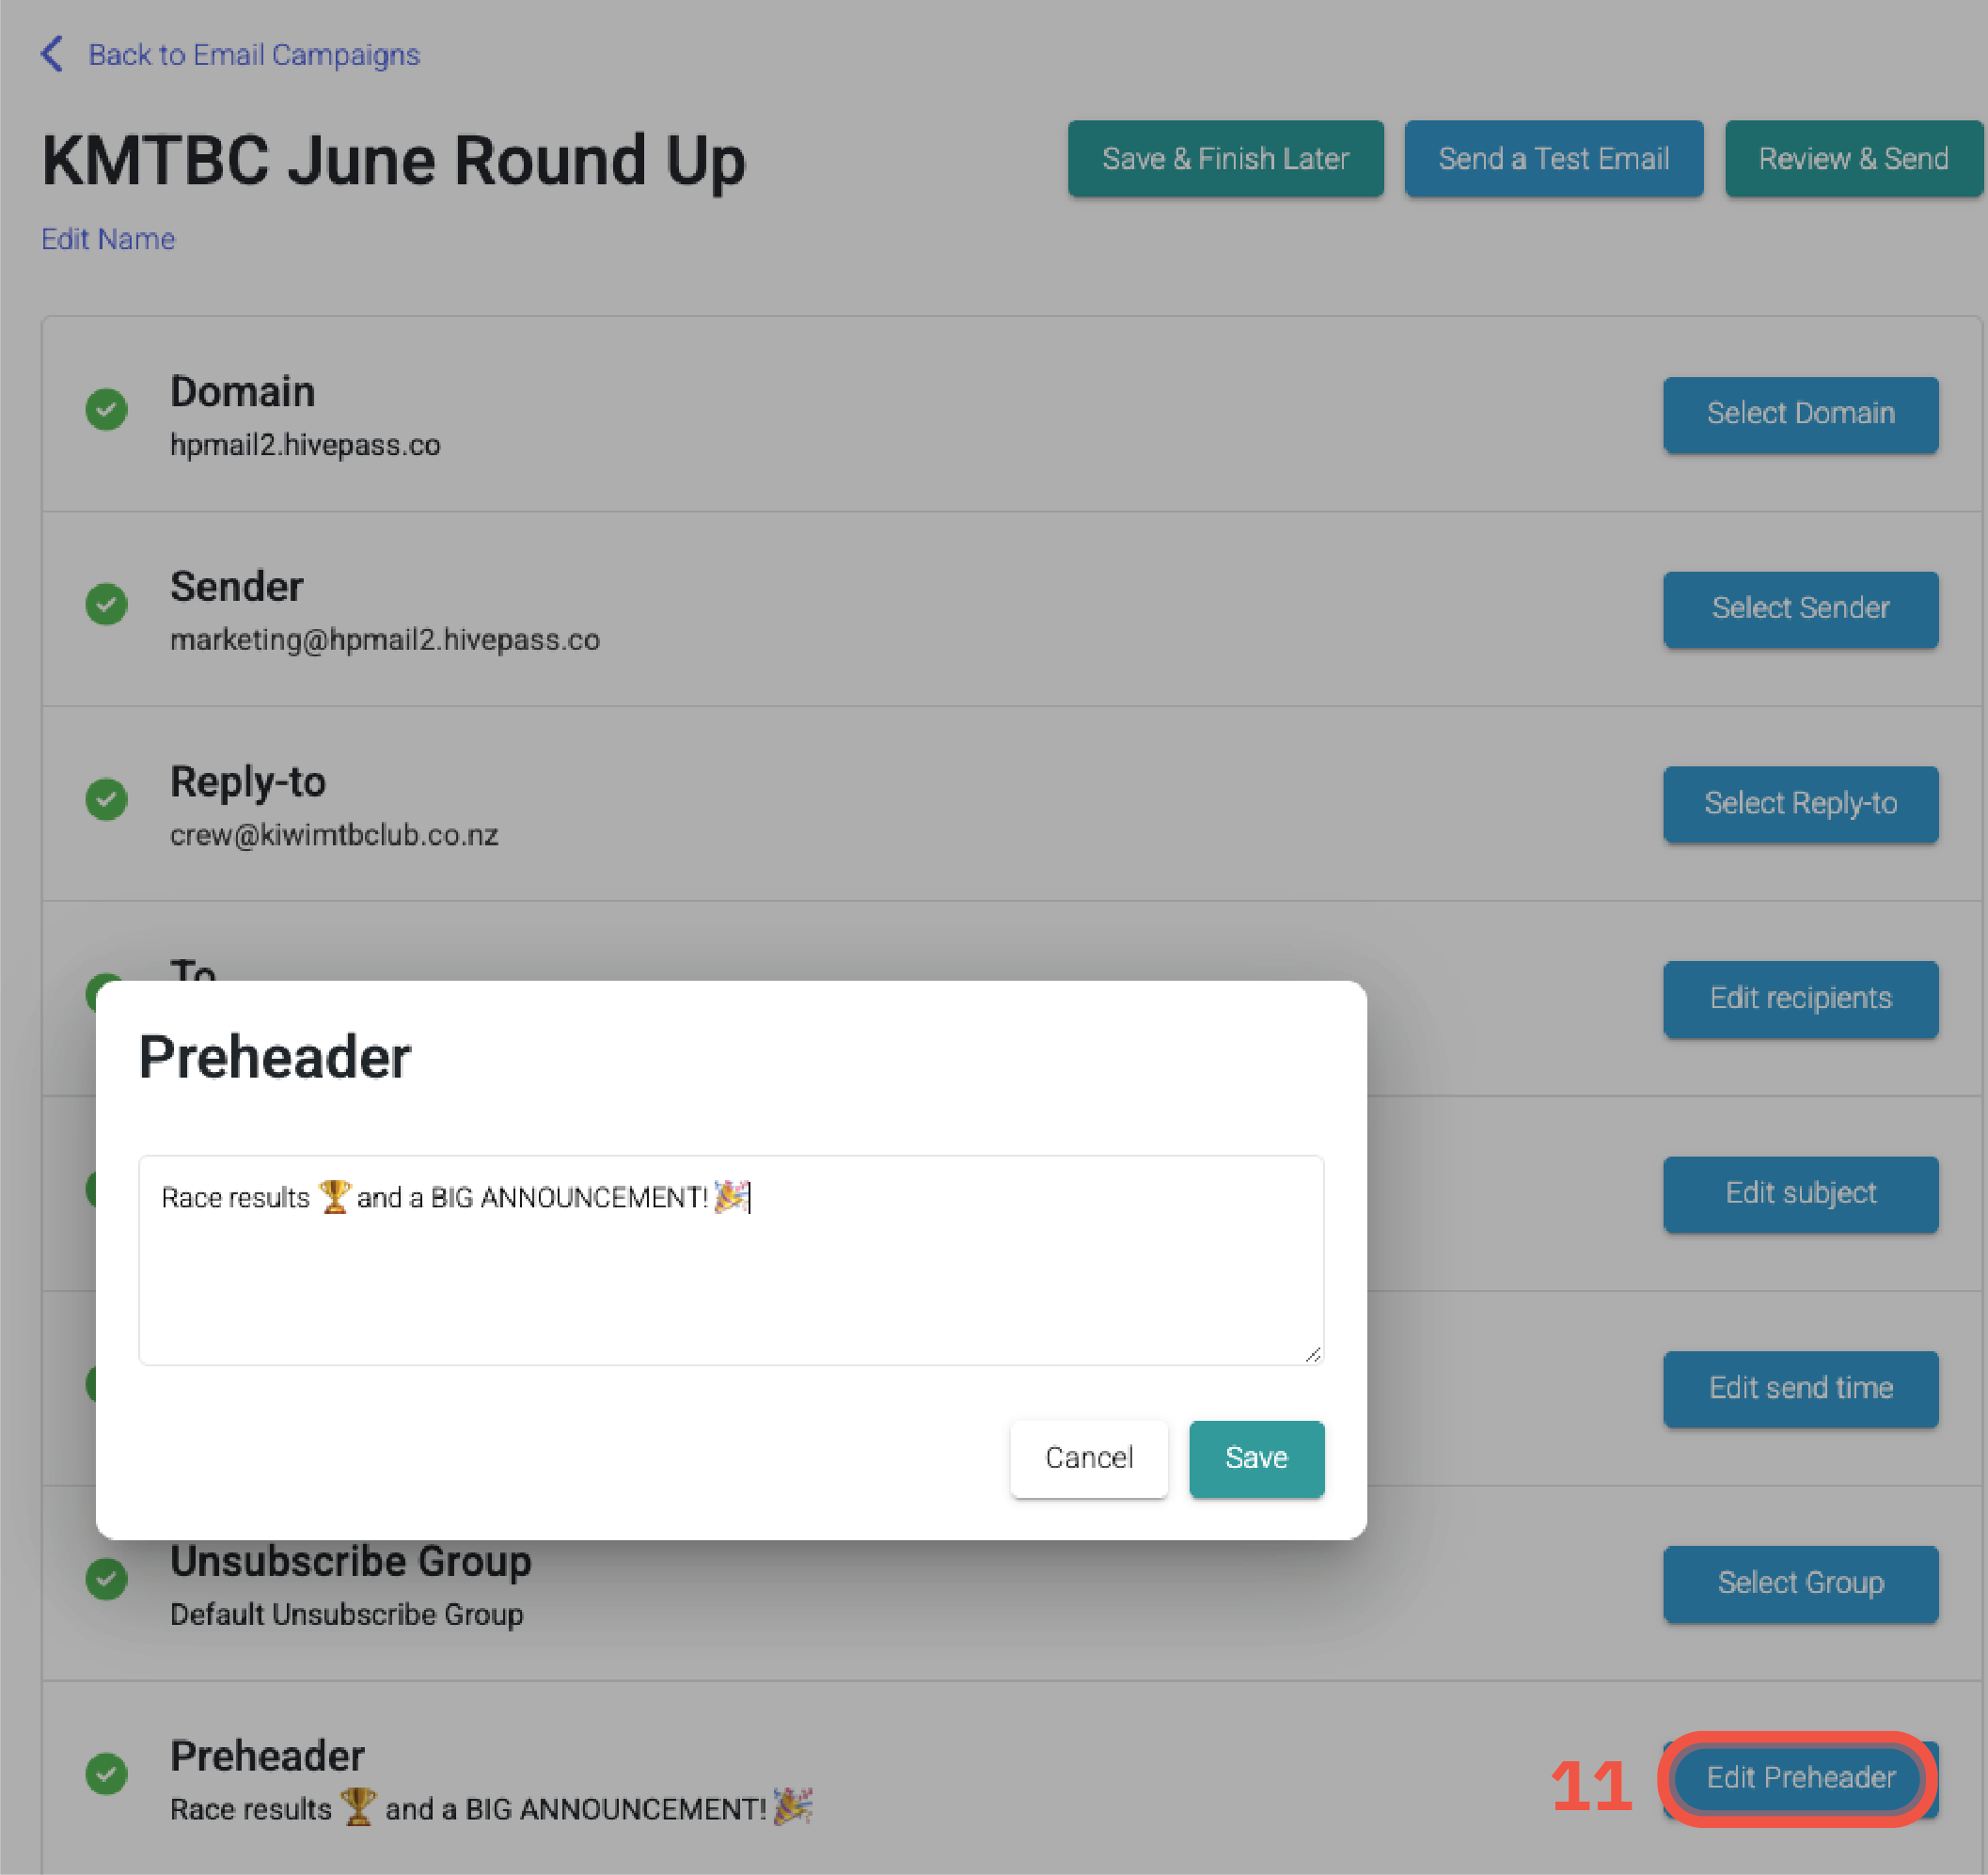
To set your preheader text:
- Navigate to the front page of your email campaign (the 'Settings' page)
- Select 'Edit preheader' and input the copy here. A couple of well-placed emoticons can make all the difference here.
- Keep the preheader to approximately 50-70 characters.
- Save

👍 Check out this help doc that details what statistics Hivepass email campaigns auto-track
Previous article: Newsletter editor - content part 2