
Donation receipts in New Zealand
For your members to claim income tax relief on any charitable donations they have made to your organisation, they will need a donation receipt from you. This receipt needs to fulfil certain criteria.
Requirements in New Zealand
It is not a legal requirement for your organisation to provide donation receipts in New Zealand, but you may get asked by donors to provide one. Creating these manually takes a lot of time, so any donations made through Hivepass automatically generates a receipt that is emailed to the donor.
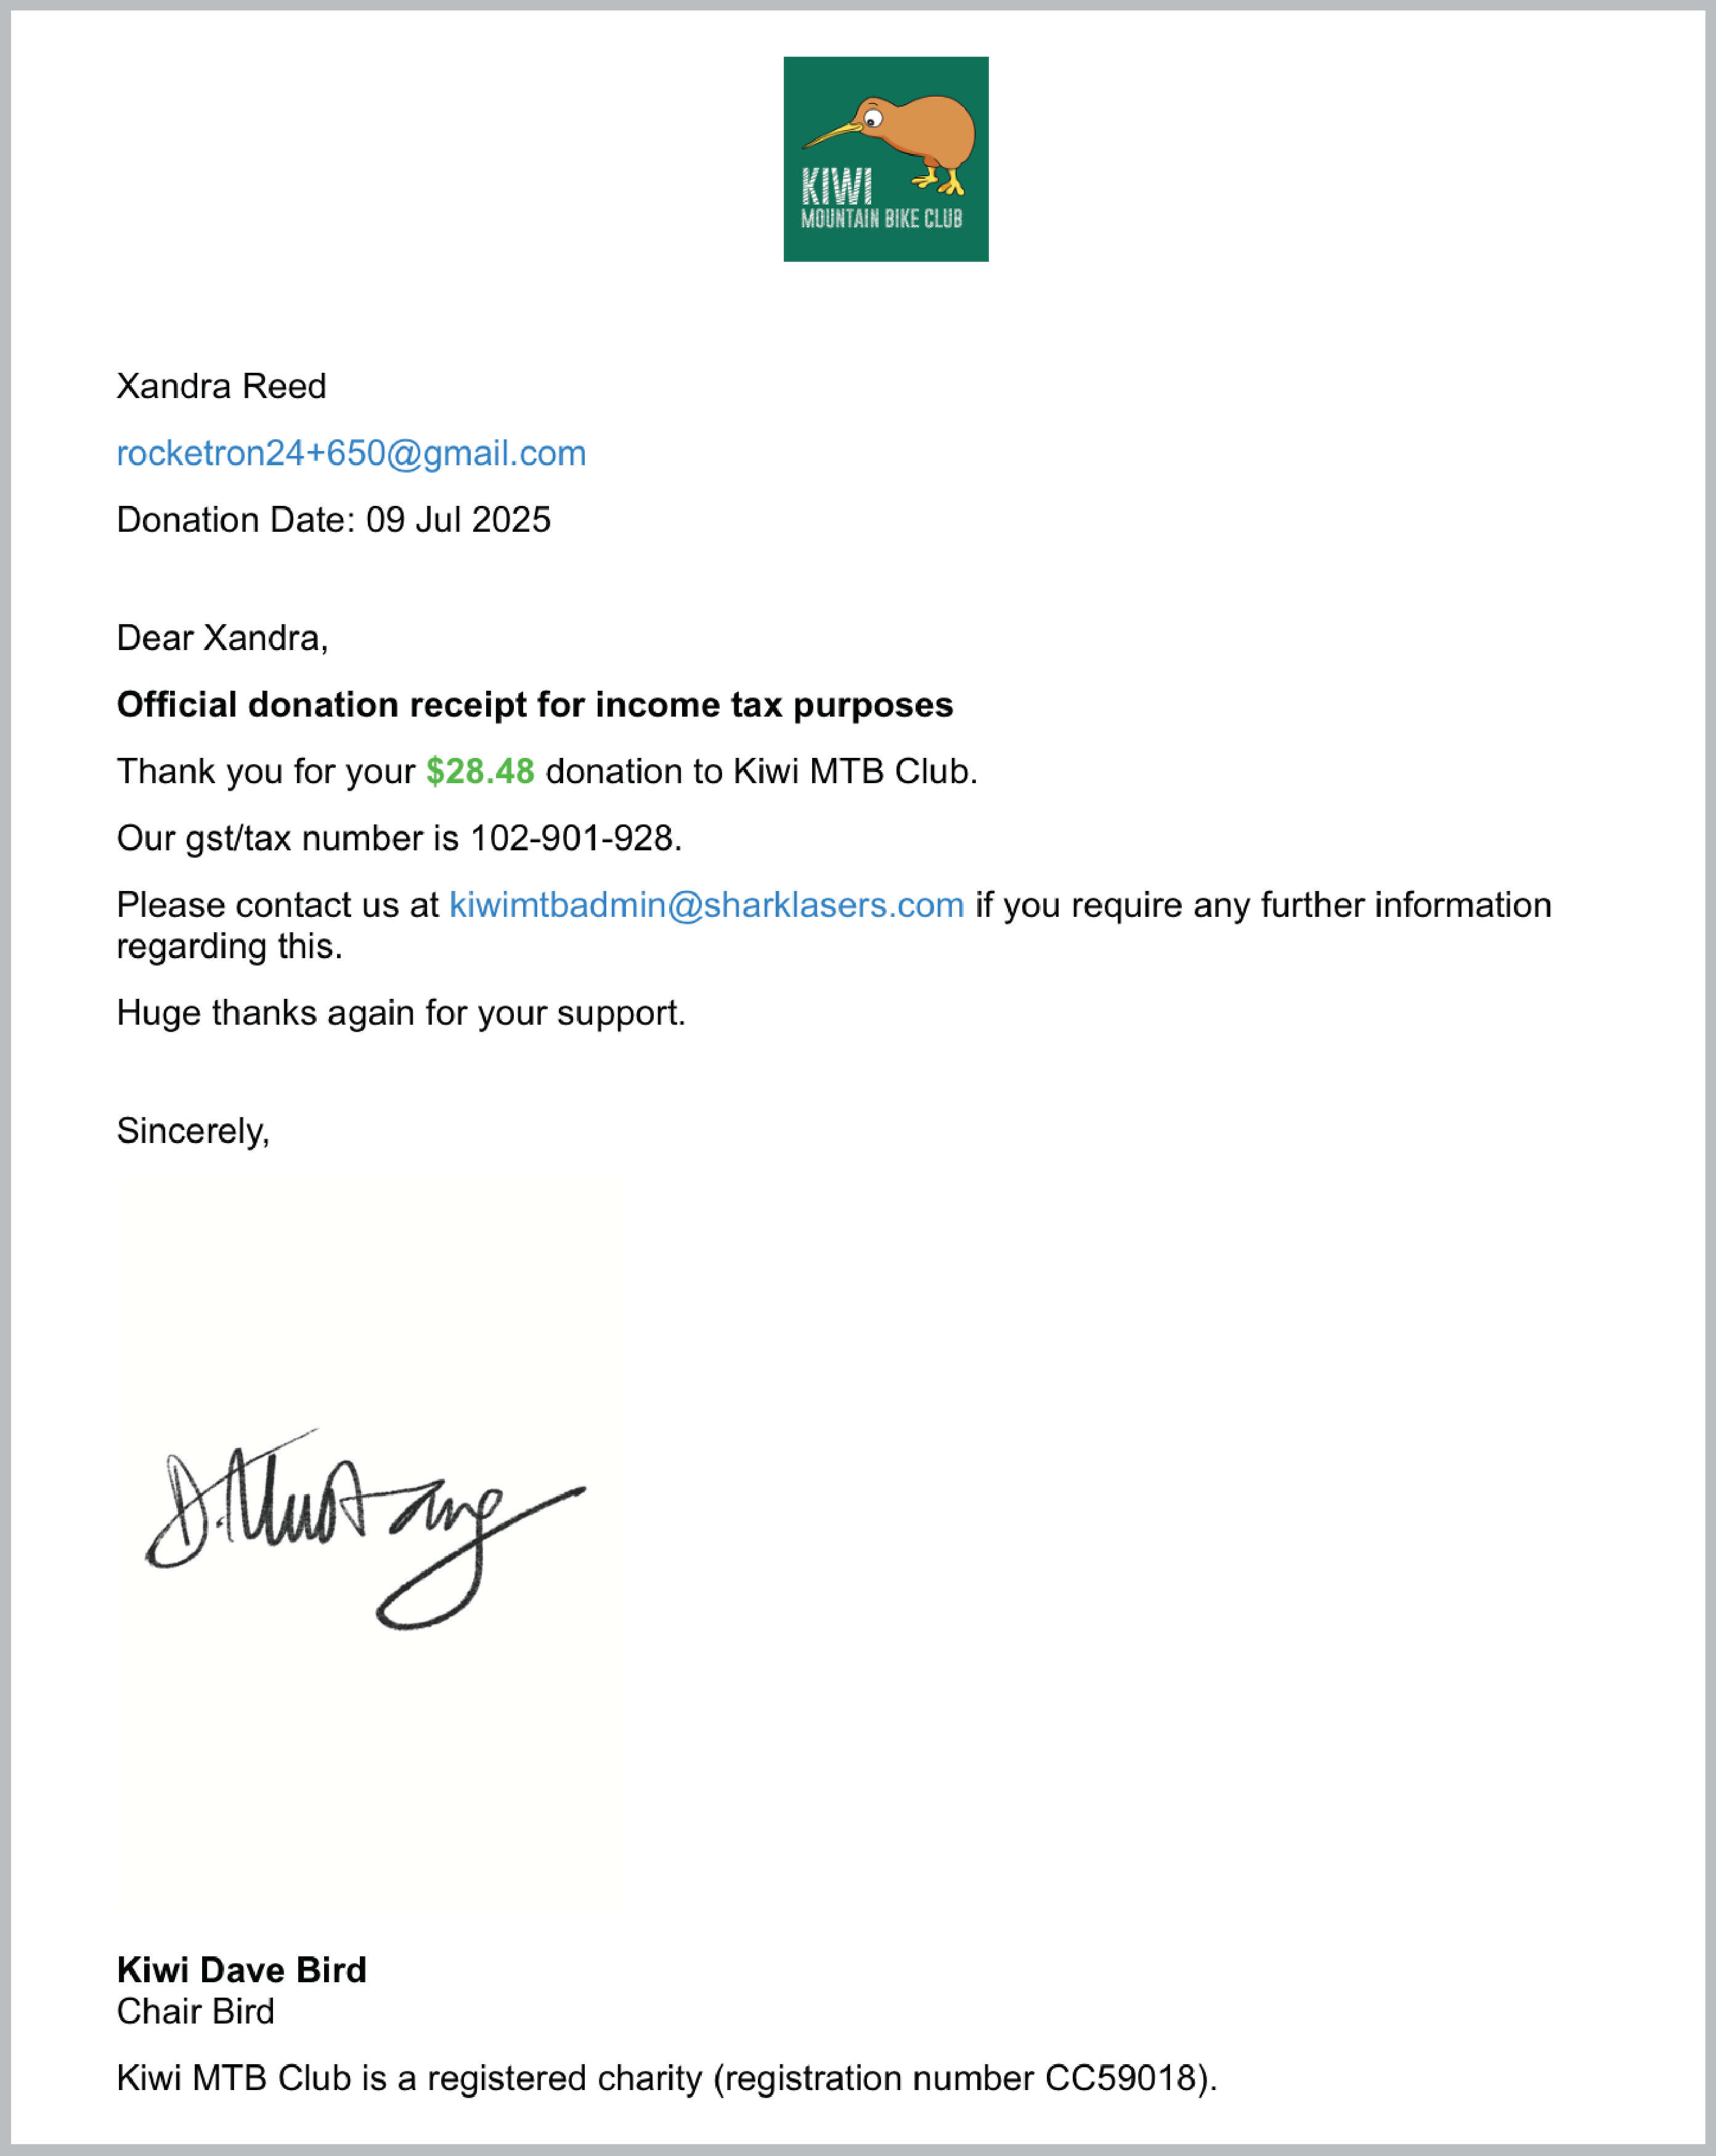
Donation receipts are required to show:
- donor’s full name
- the amount they donated (this will be auto-populated by Hivepass)
- the date they donated (this will be auto-populated by Hivepass)
- a clear statement that it was a donation
- your organisation’s name, Charities Services registration number and IRD number
- your official stamp or logo or letterhead
- The full name, designation, and signature of an authorised person from your organisation
- A receipt number, unique to each receipt (this will be auto-populated by Hivepass)
For more information on charitable donations and your obligations (in NZ), visit Charities.govt.nz
It’s easy to set up in Admin with the following steps;
- Go to Settings> Donation Settings
-
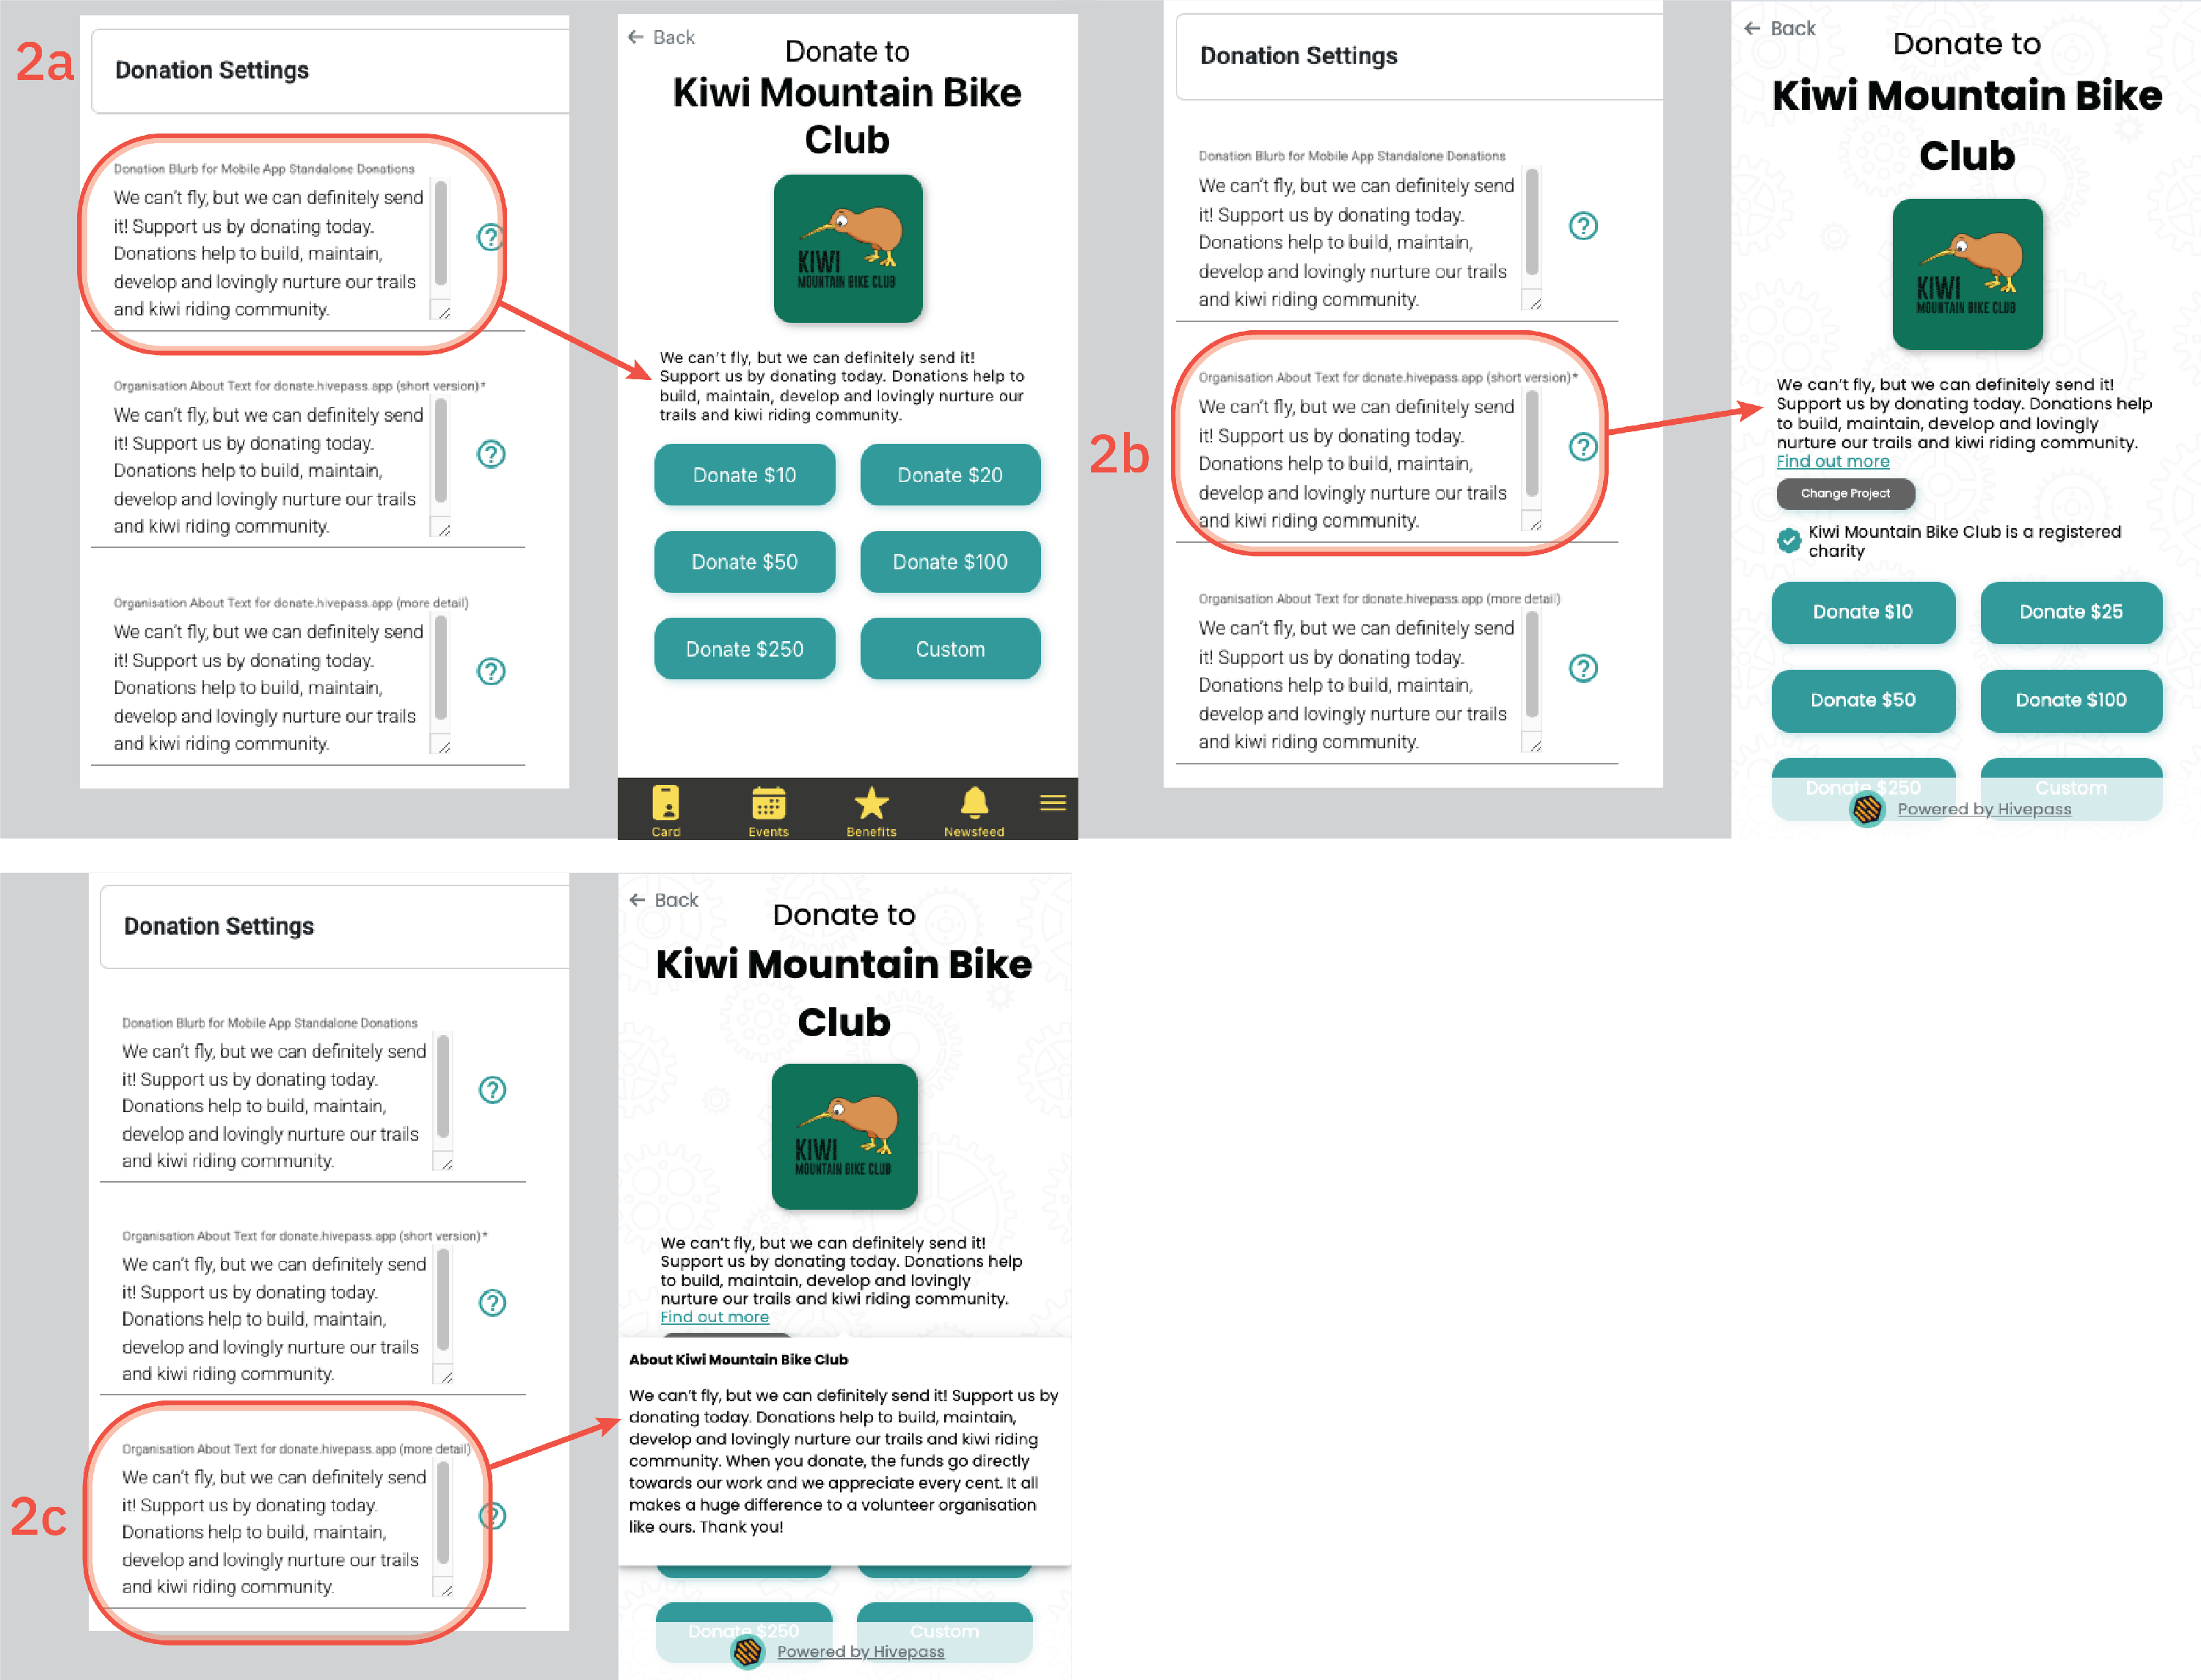
Enter copy into the text boxes on the left. These will show before and after a user donates. Keep it short, sweet and persuasive!
• 2a is the donation blurb that shows when a user navigates to donate via the side menu in the app. • 2b is copy about the organisation that a user will see when they have scanned a QR Code or clicked a link (for example on a sign or in an email) to open the donate.hivepass.app page in a browser.
• 2c is an expansion of 2b that the user will see if they click 'find out more' below the 2b copy.
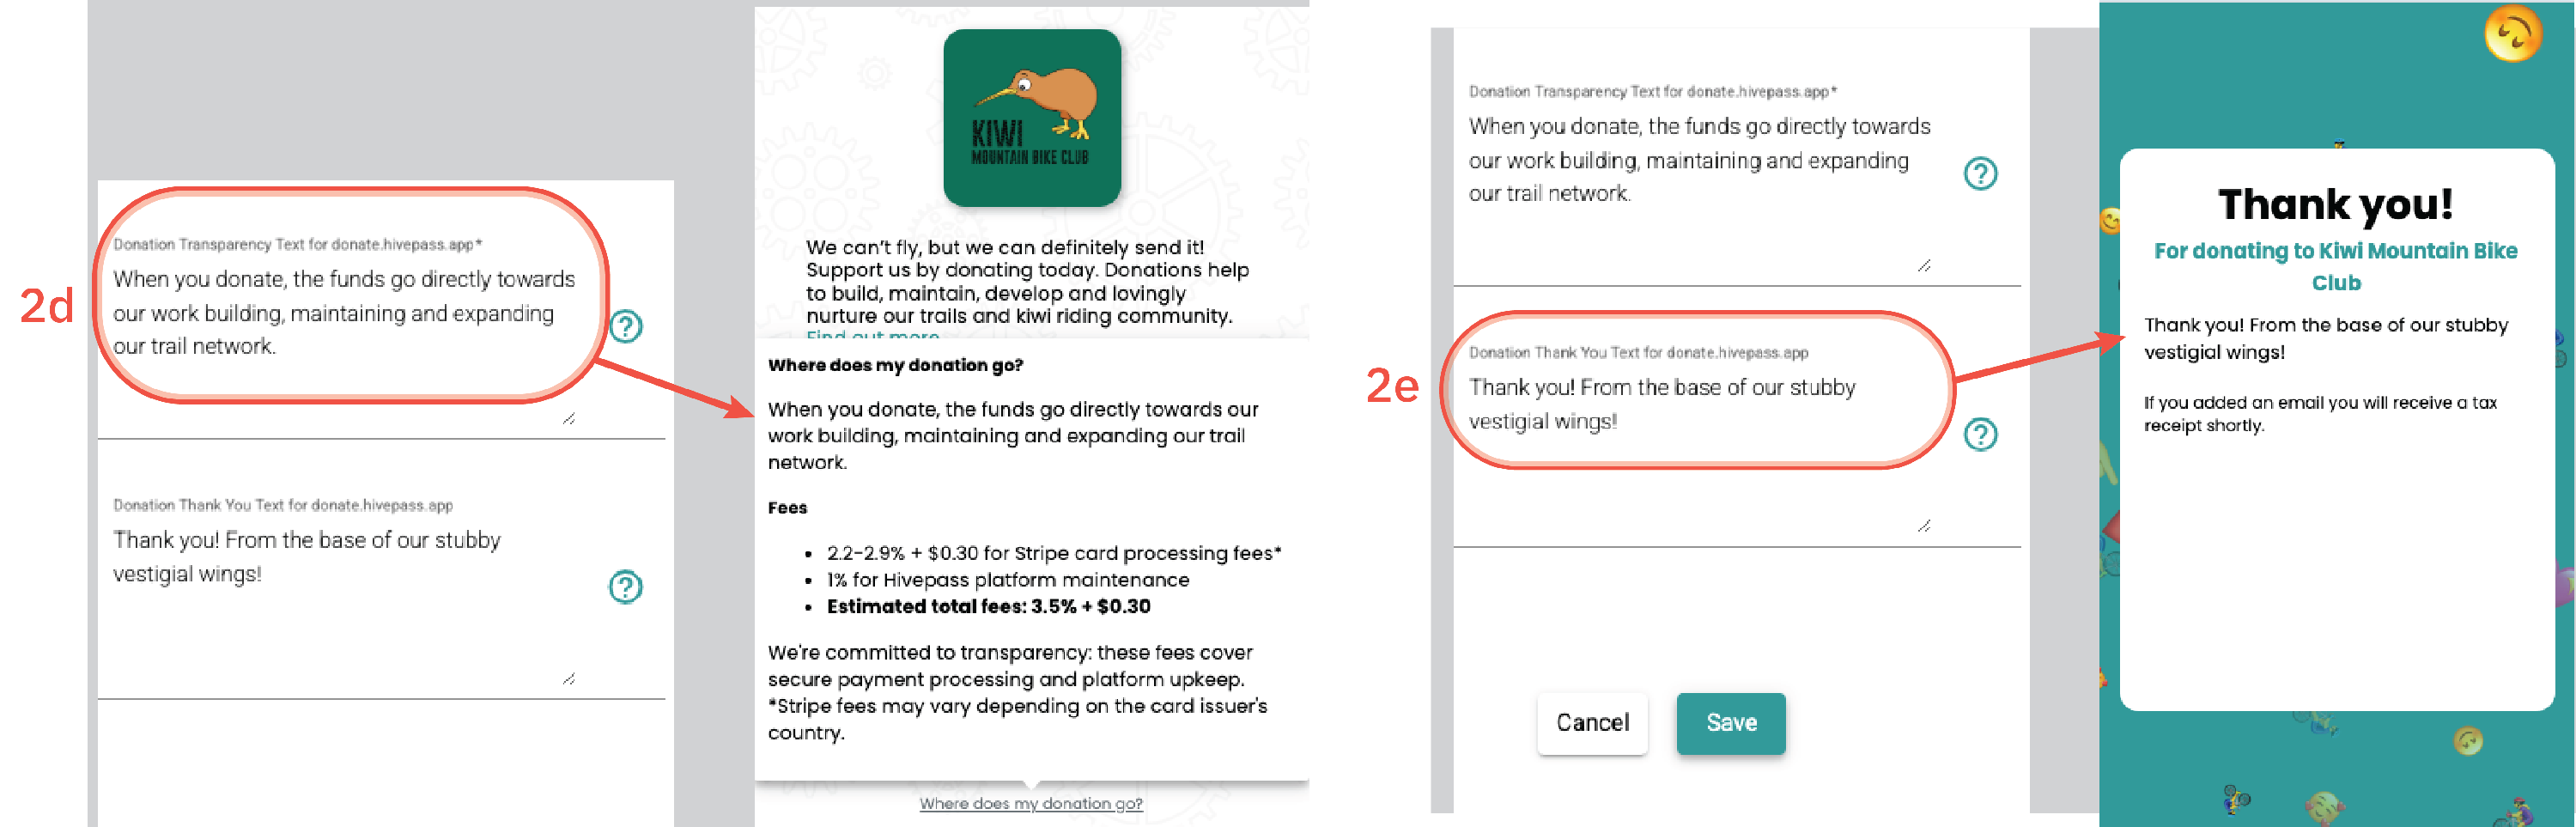
• 2d is the 'transparency' copy that shows when a user clicks on 'where does my donation go?'
• 2e is the Thank You message a donor sees after donating.
See the below image examples for each of the above (2a-2e).
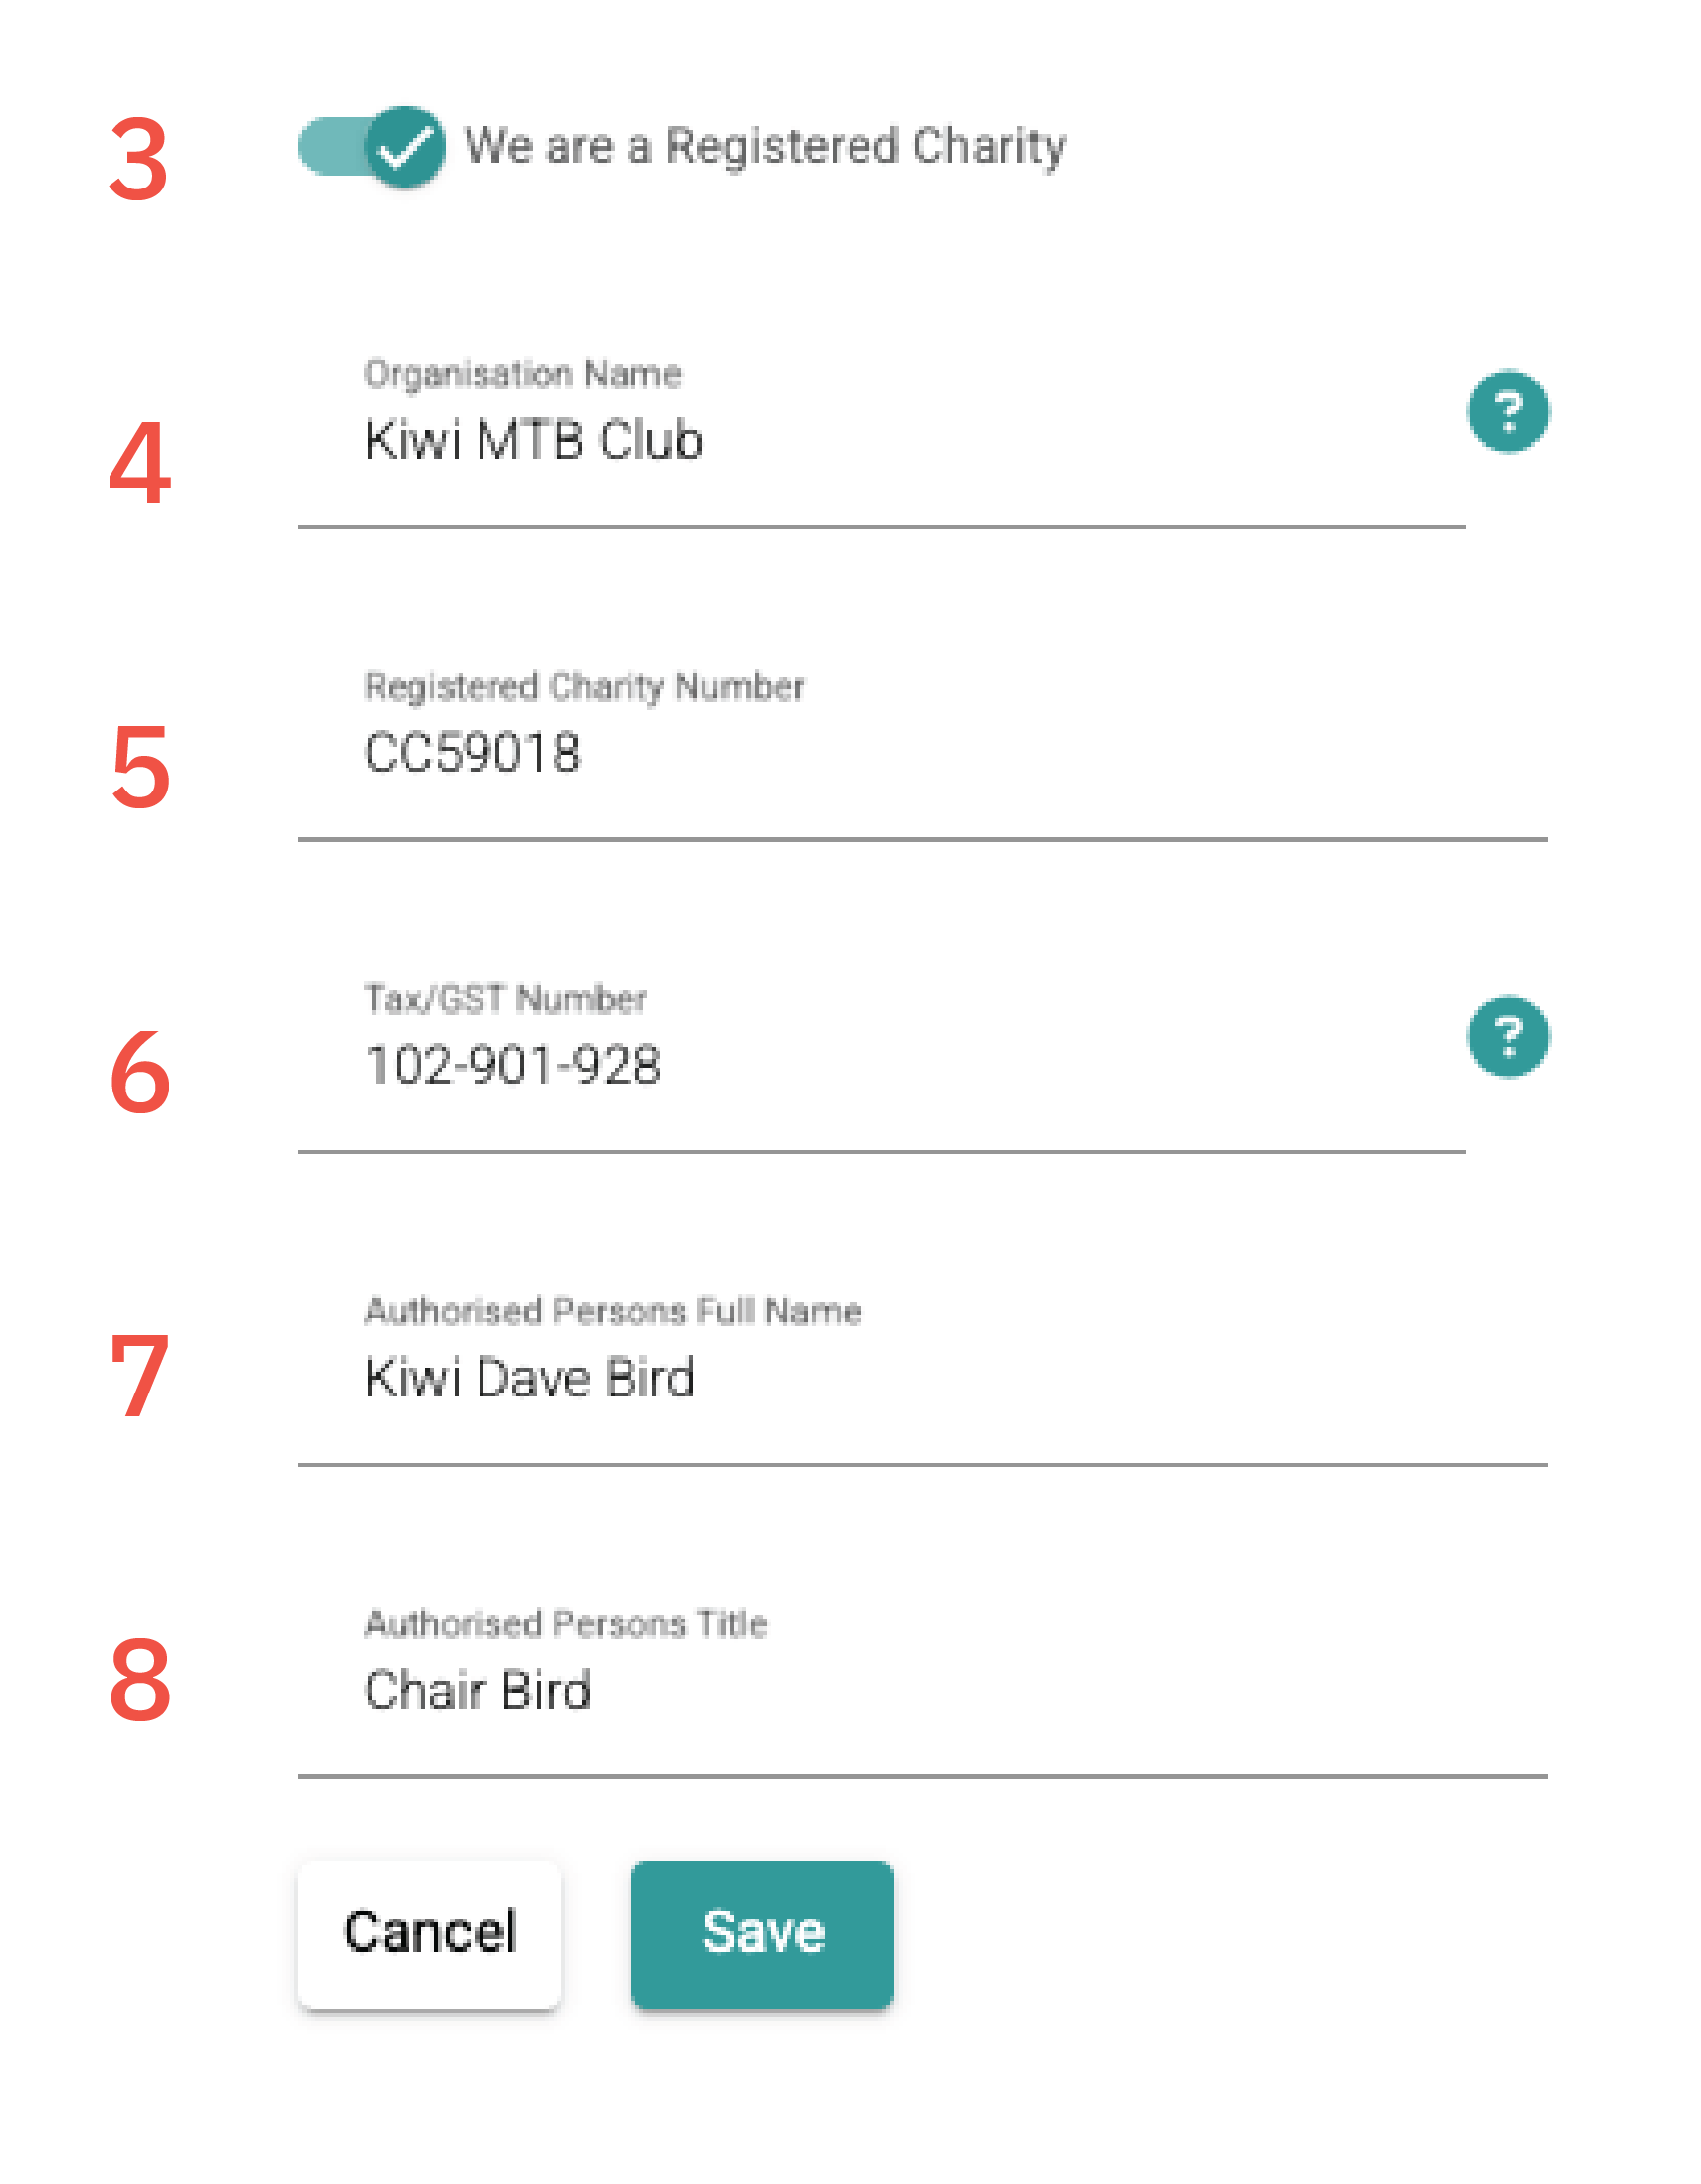
- Toggle on ‘We are a registered charity’
- Enter the legal name of the organisation
- Enter your Registered Charity Number (for example: CC54321)
- Enter your IRD (GST) number
- Enter your authorised person’s name. For example the Chairperson or Treasurer
- Enter their title
- Upload an image of their signature. This can be a photo or a scanned image
- Upload your organisation / letterhead logo
- Toggle on ‘Send Donation Receipt Email’ to ensure that the donor receives a receipt.
- Toggle on if you wish a copy of the receipt to be sent to an email address of your organisation. The contact listed here is set in Settings> Hivepass Support Contacts
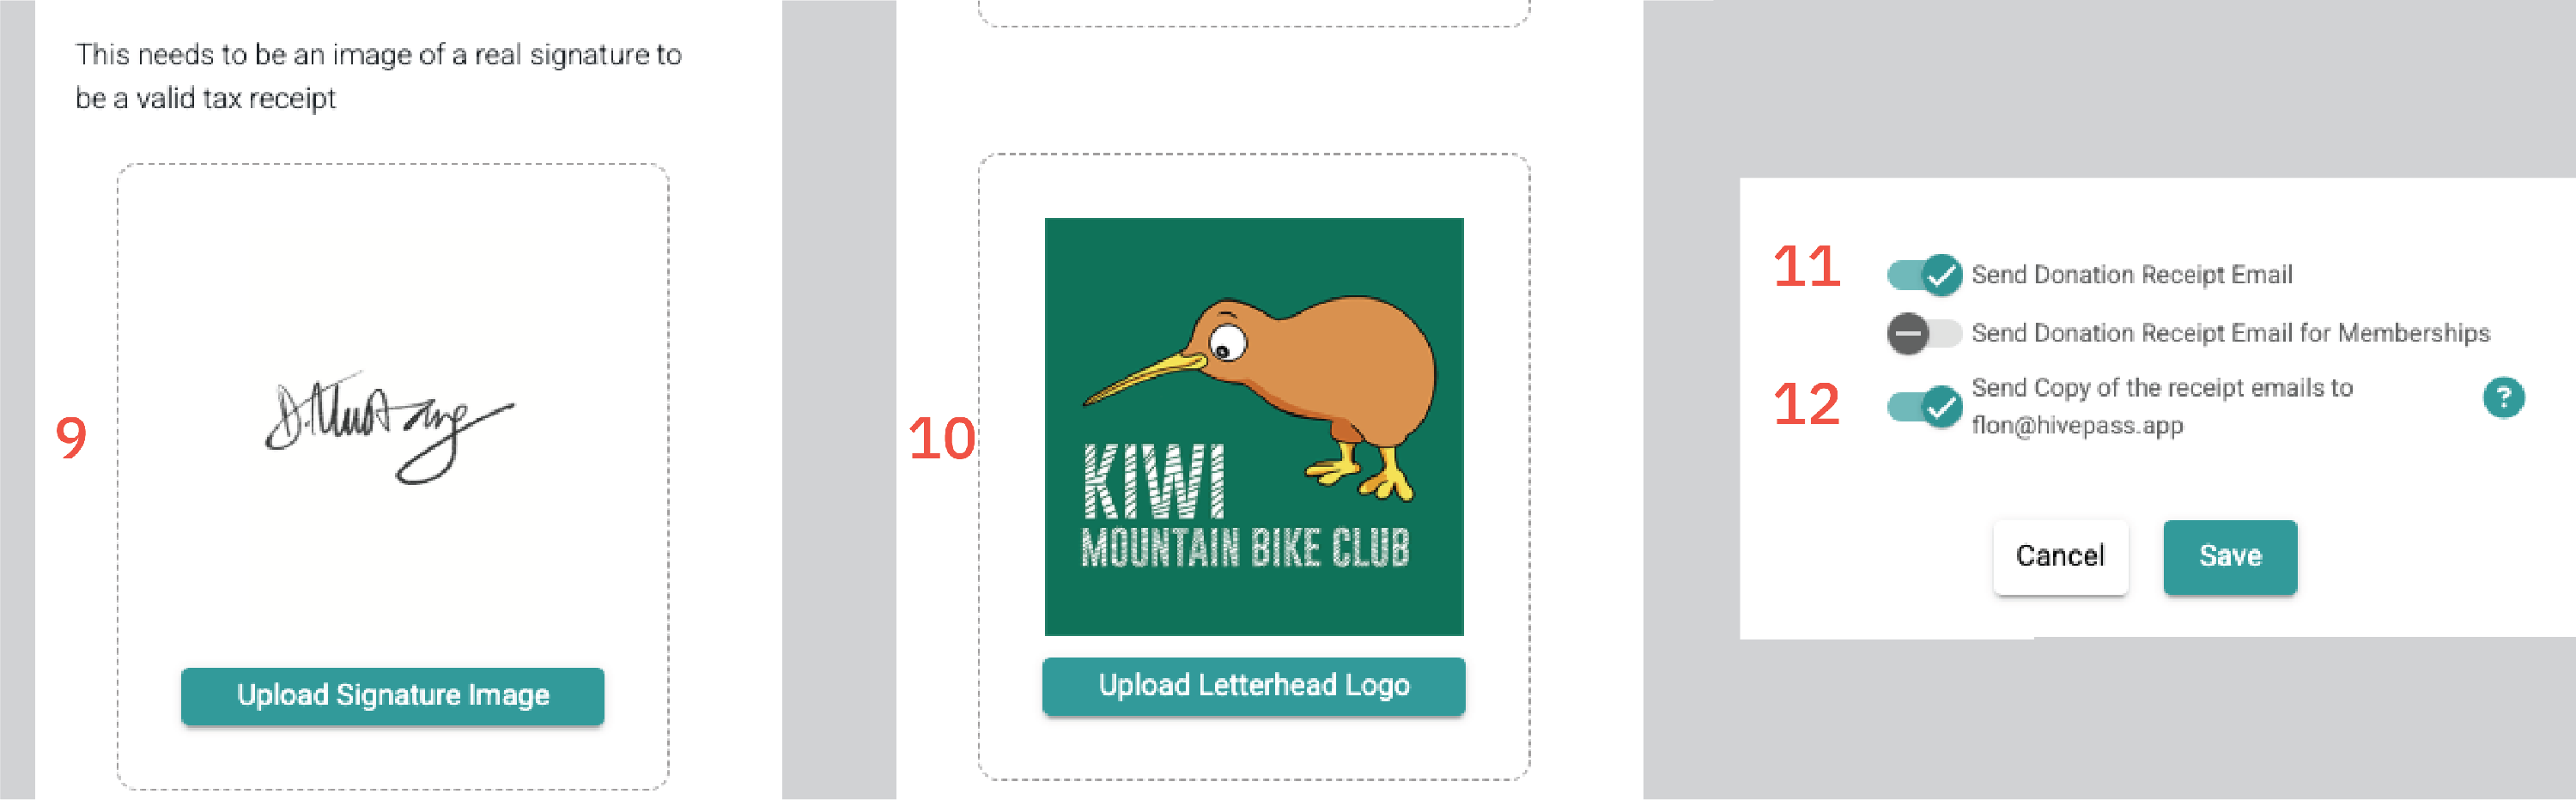
NOTE: Hover over the ? icon for more information at any time.
Resending donation receipts
A donation receipt can be sent to a member at any time.
- Go to Community> Contacts and select the relevant member
- Open the Financial Transactions tab in their profile
- Select Resend Donation Receipt
- Confirm
