
Email campaign - contact lists
Contact lists are groups of your members that you can select to send email campaigns to.
In this article:
- 🗒️ What is a contact list?
- ⚙️ System contact lists
- ➡️ Import contacts to create lists
- 🔧 Updating contact lists
- 🏷️ Generate contact lists based on member tags
- 🔔 Subscribe link
- ⛔️ Unsubscribe groups
🗒️ What is a contact list?
Contact lists allow you to target particular interest groups or types of users within your organisation. For example: if you have a number of inactive users, they can be added to a contact list and then sent a membership drive email campaign to encourage them to convert from inactive users to active members.
⚙️ System contact lists
Hivepass will automatically set up default contact lists for you;
- All contacts and members
- Active members (excluding family members without an email address)
- Inactive contacts
🤖 These lists are auto-generated by the system and can't be edited or deleted.
➡️ Import contacts to create lists
This is useful if memberships are being combined between organisations, or contacts are generated through an event / sign up list and a group of contacts data needs to be imported.
To import contacts:
- Go to Settings > Communications > Import Contacts
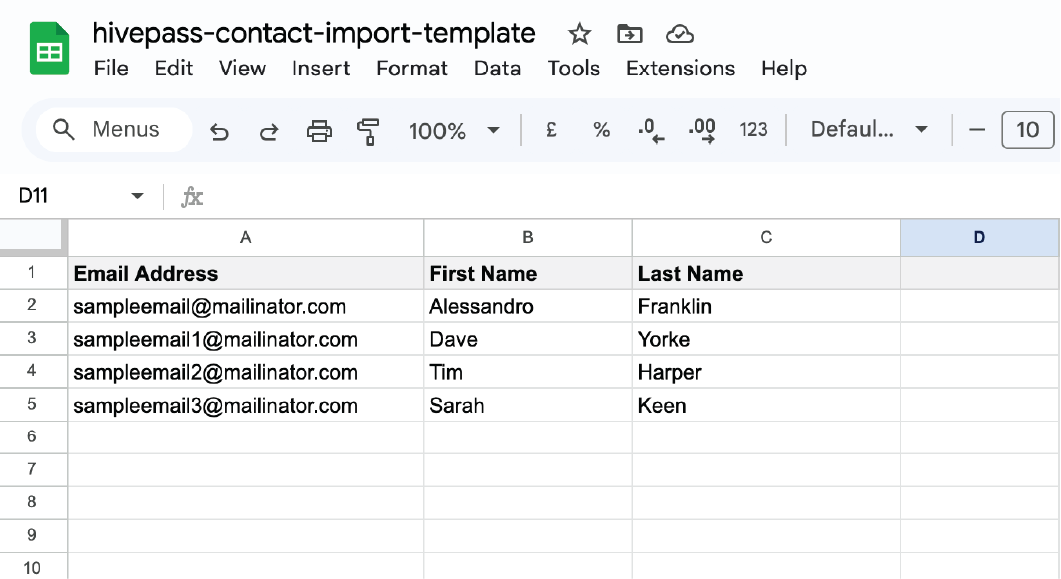
- Download the csv template here. Contacts you import MUST be in this format to import correctly
- Once you have your data loaded into the csv, decide if you wish these contacts to form a new contact list (name the list) or be added to an existing contact list (select from drop down).
- Select Upload Contacts from csv
- Navigate to Contact Lists from the side menu to view the list you have created or imported your contacts to.


🔧 Updating contact lists
- You can update any user generated contact lists
- Select the list to open or use the 3 dots to edit / delete
- Here you can change the name of the list, search for a specific contact and filter all contacts.
- Toggle on to 'Show selected only'. If this is toggled off, the contacts already included in the list will appear highlighted in green. You can then scroll through your library of contacts and add any manually. There is a handy counter at the bottom to show how many contacts you have selected.
- Save
💡 Contacts are not members. Contacts are used purely for email communications and only have an email address and name. If you want to add a member go to the Community > Contacts

🏷️ Generate contact lists based on member tags
☝️We recommend that this article on Member Tags is viewed first.
If you wish to send an email campaign to a special interest group based on system generated tags or User generated tags, you can do this by creating a Contact List selecting these contacts / users only.
- On the Contact List page, select 'New Contact List' > Contact List from Tag
- Name your list and select the relevant tags. They will appear in green
- Save
- Any new members /contacts that fit the criteria to be tagged with the categories selected will automatically be added to this contact list.


🔔 Subscribe link
If people in your community are not yet app users, you can share a link for them to subscribe to your newsletter. Generate the link here:
- Go to Communications > Contact Lists
- Create a new contact list for your users to be added to, or select an existing contact list
- Go to the three dots at the right hand side and expand the menu. Select 'Get Signup Form'
- The link will be automatically copied to your clipboard, ready to paste to social media or include on your website etc,.
☝️ Links can only be generated for custom contact lists, not system contact lists (i.e: All active members) that are automatically generated.

⛔️ Unsubscribe groups
To view and create Unsubscribe groups, go to Communications > Unsubscribe Groups
Here's how it works:
When you send an Email Campaign, you need to select an Unsubscribe Group. If a contact belongs to that unsubscribe group they should not receive the email.
Example: If you create an unsubscribe group called 'Monthly Newsletters' and a contact belongs to this group, you then send an email campaign to your contacts and select the Monthly Newsletters unsubscribe group when you are setting up the campaign, the contact will NOT receive the email.
💡 Contacts can be added manually to an unsubscribe group, OR they are automatically added when they click 'unsubscribe' at the bottom of an email you have sent them. See more below.
If the email campaign is set to a different unsubscribe group the contact will receive the email.
🚷 If a contact belongs to the default unsubscribe group that Hivepass creates automatically, they will never receive any email campaign emails.
Creating an Unsubscribe Group:
Go to Communications > Unsubscribe Groups
Select New Unsubscribe Group at the top right if you wish to make a new group.

To update the name and description of a group, click on the name (if blue).
To view the email addresses of contacts who have unsubscribed, click on the three dots to the right and select 'view emails'.

To unsubscribe a user manually, use the field at the bottom right to enter the email address and select 'Add email address'.

This user will no longer receive emails from your organisation.
🤖 The default unsubscribe group can't be deleted.