
Using the Trails feature
The Trails feature allows you to list the trails in your network, add an image, update the status and link to Trailforks. This feature is a great way to ensure that the status of your trail network is correct and up to date!
In this article
- ⚙️ Turning on the Trails feature
- 📍 Where Trails shows in the mobile app menu
- ⭐️ Overview - main Trails page
- 🗺️ Creating a Trails item
- ⚠️ Updating trail status
🔧 Turning on the Trails feature
Before adding Trails content, make sure the feature is enabled in your admin settings:
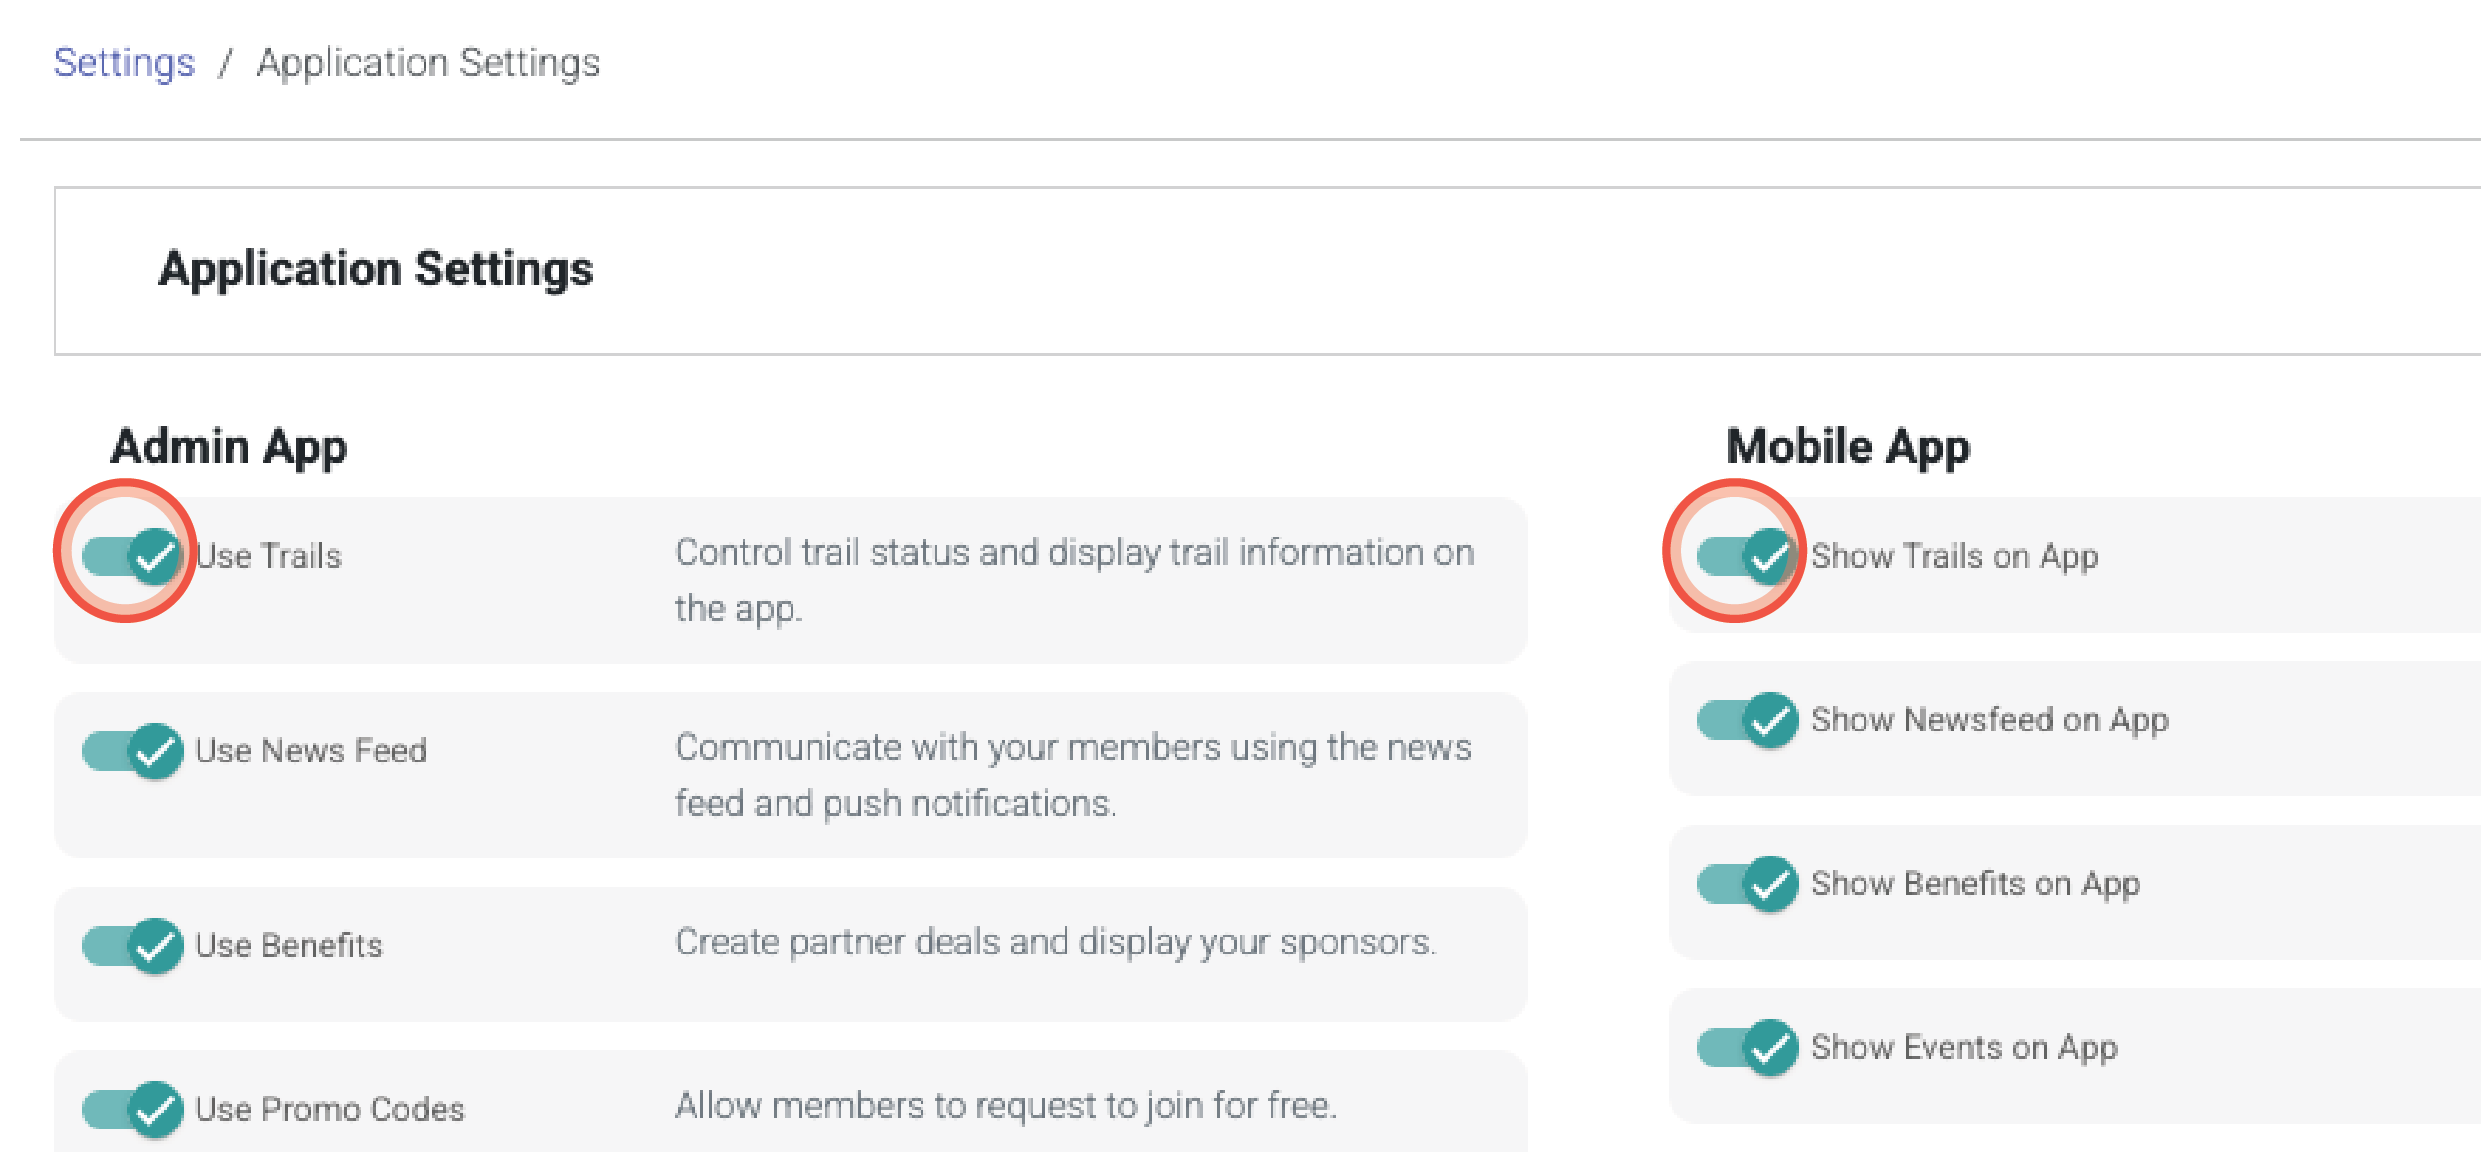
- Go to Settings > Application Settings
- Under Admin App, toggle Use Trails to ON
- Under Mobile App (right-hand side), toggle Show Showcase on App to ON
- Click Save
📍Where Trails shows in the mobile app menu
Select where you would like Trails to show as a menu item.
- Go to Settings > Application settings
- To show Trails in the bottom menu of the mobile app, drag Trails into the turquoise area under the Order Tab/Menu Items in the Mobile App list
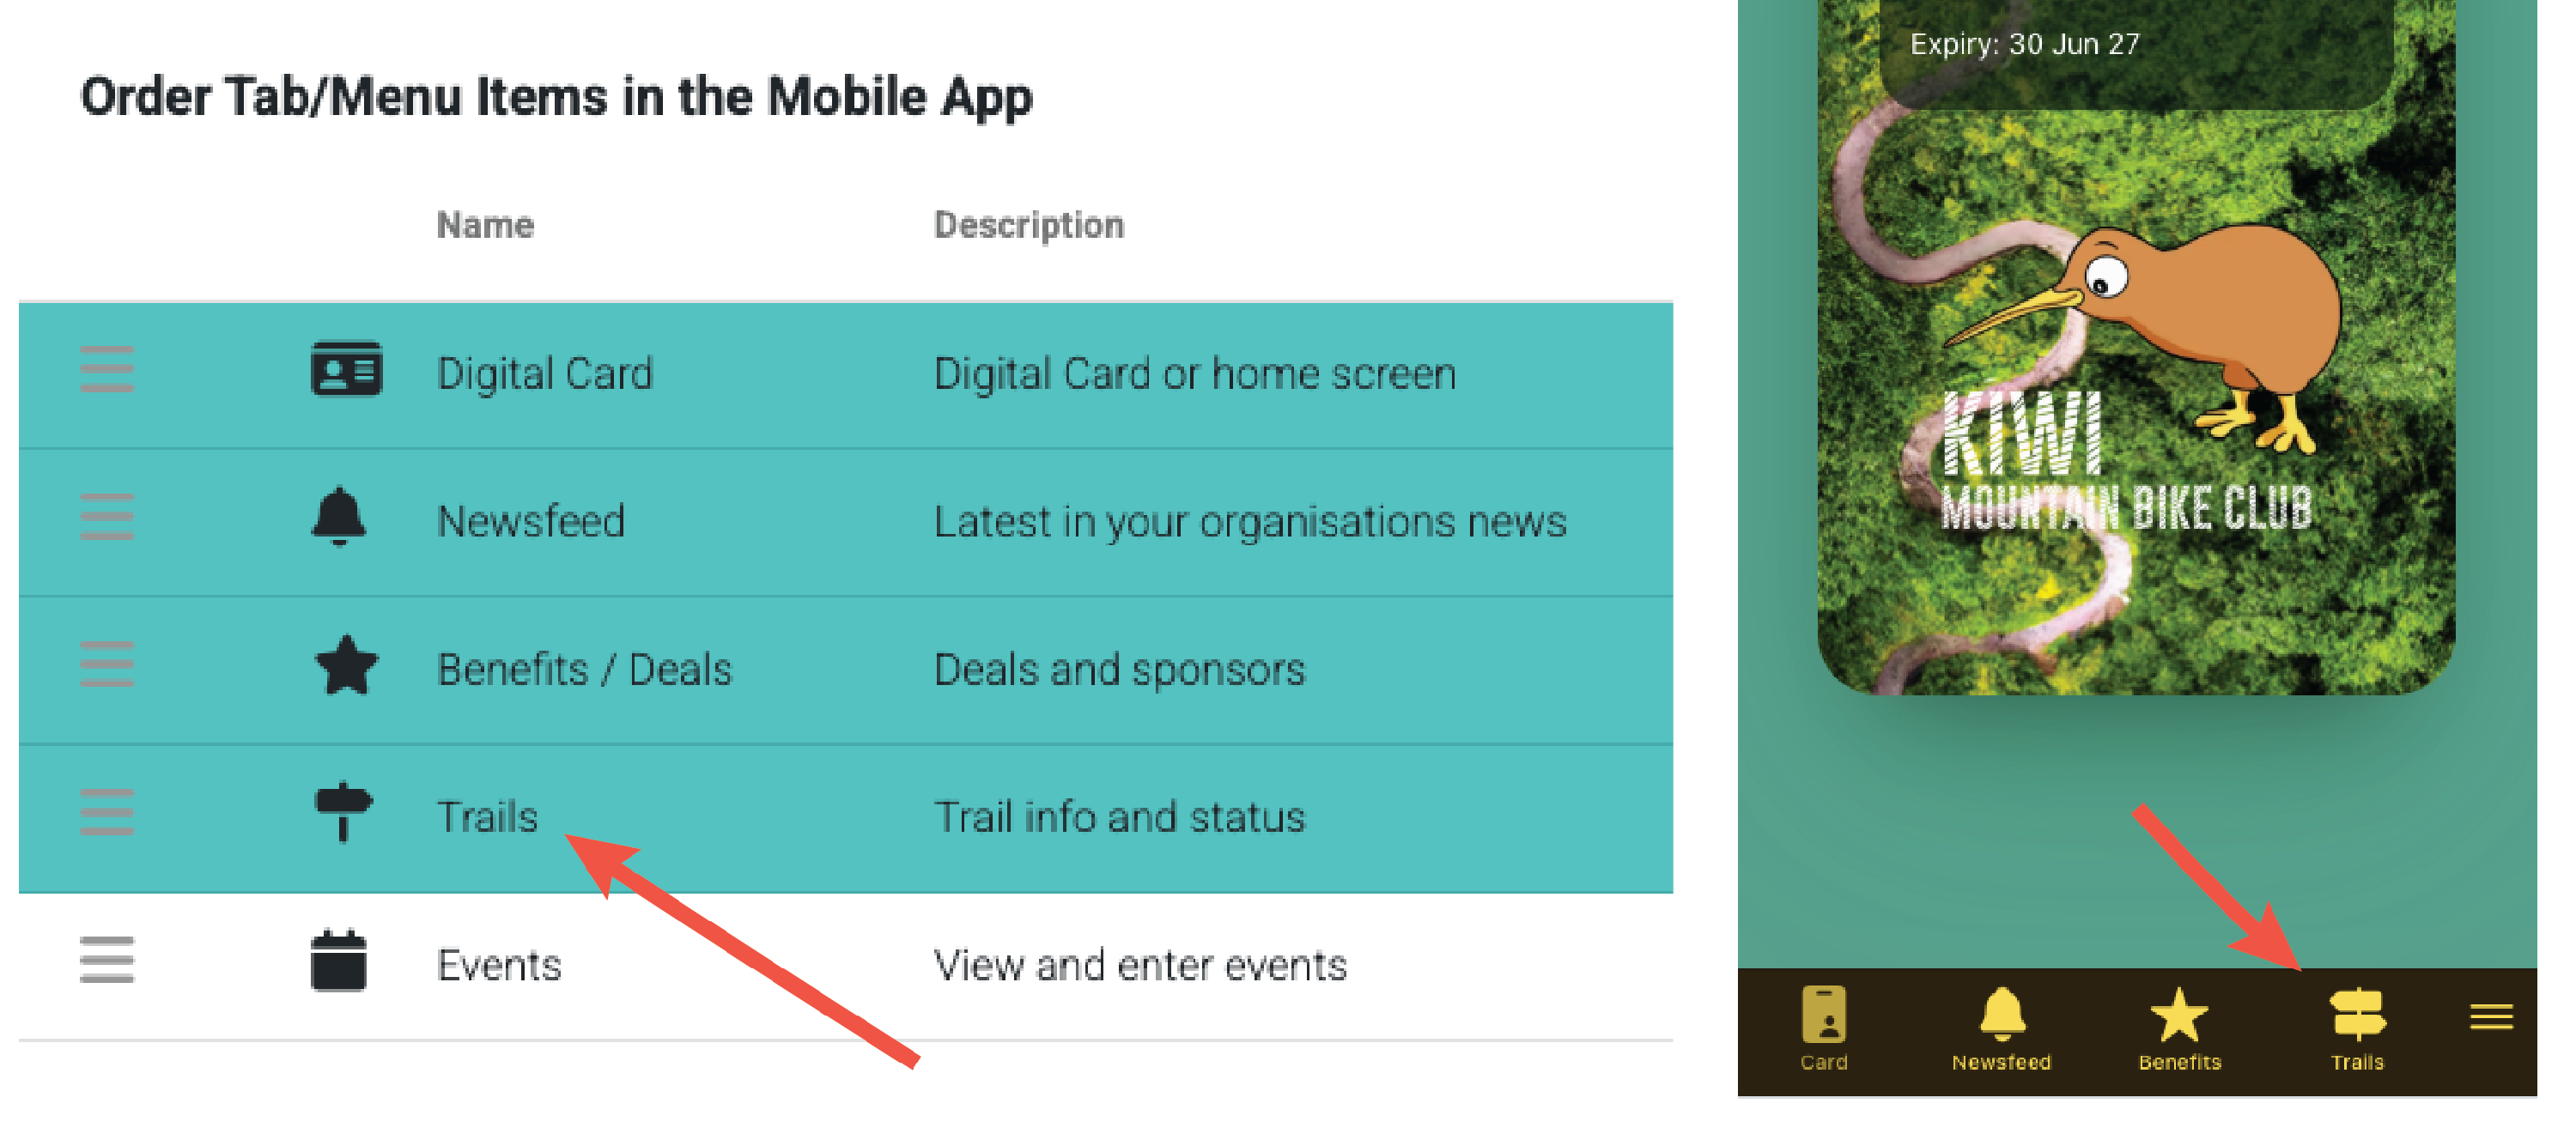
- Any items not in the turquoise part of the list will show in the side menu in the app
- Save

⭐️ Overview - main Trails page
The main trails page shows all major elements of the trails, such as name, status, grade etc.
They are grouped by region and the trails can be dragged into a custom order (that they will appear in the app) by clicking and dragging the three lines at the left.

🗺️ Creating a Trails item
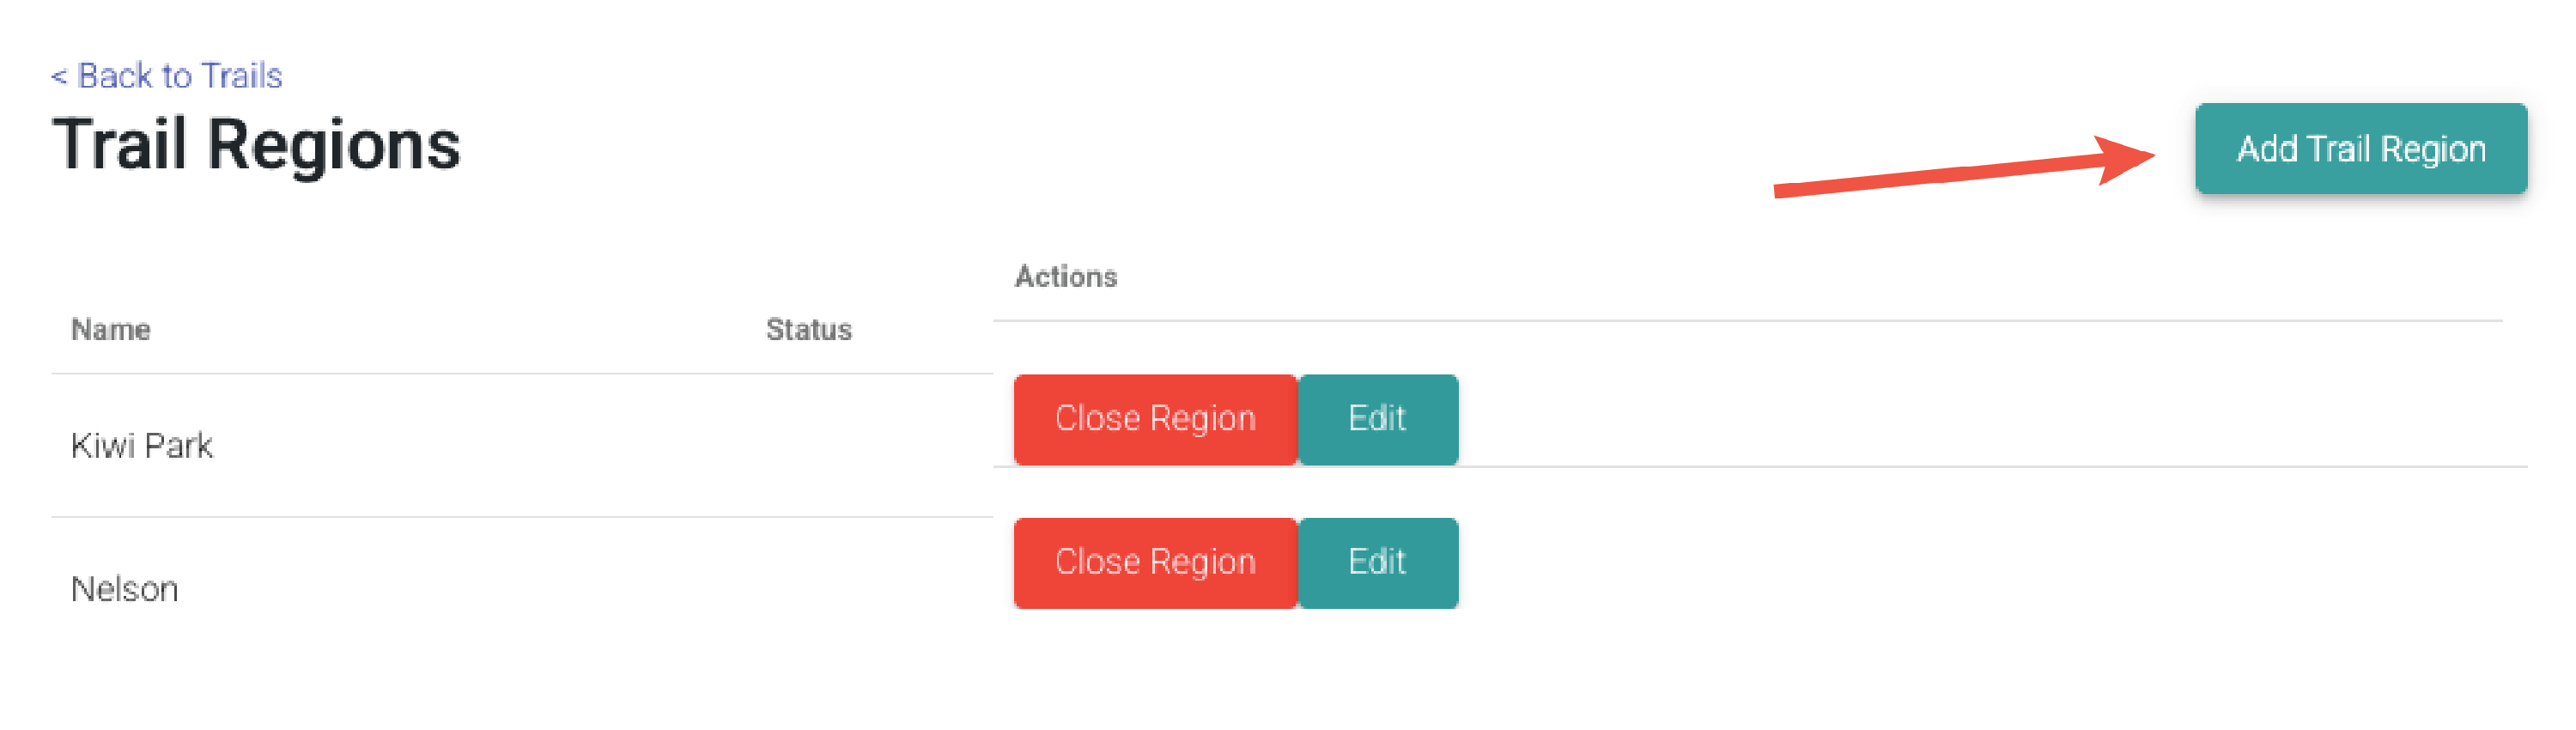
To create a new Trail listing, first add a Trail Region:
- Go to Resources > Trails in the side menu
- Click Add Trail Region at the top right
-
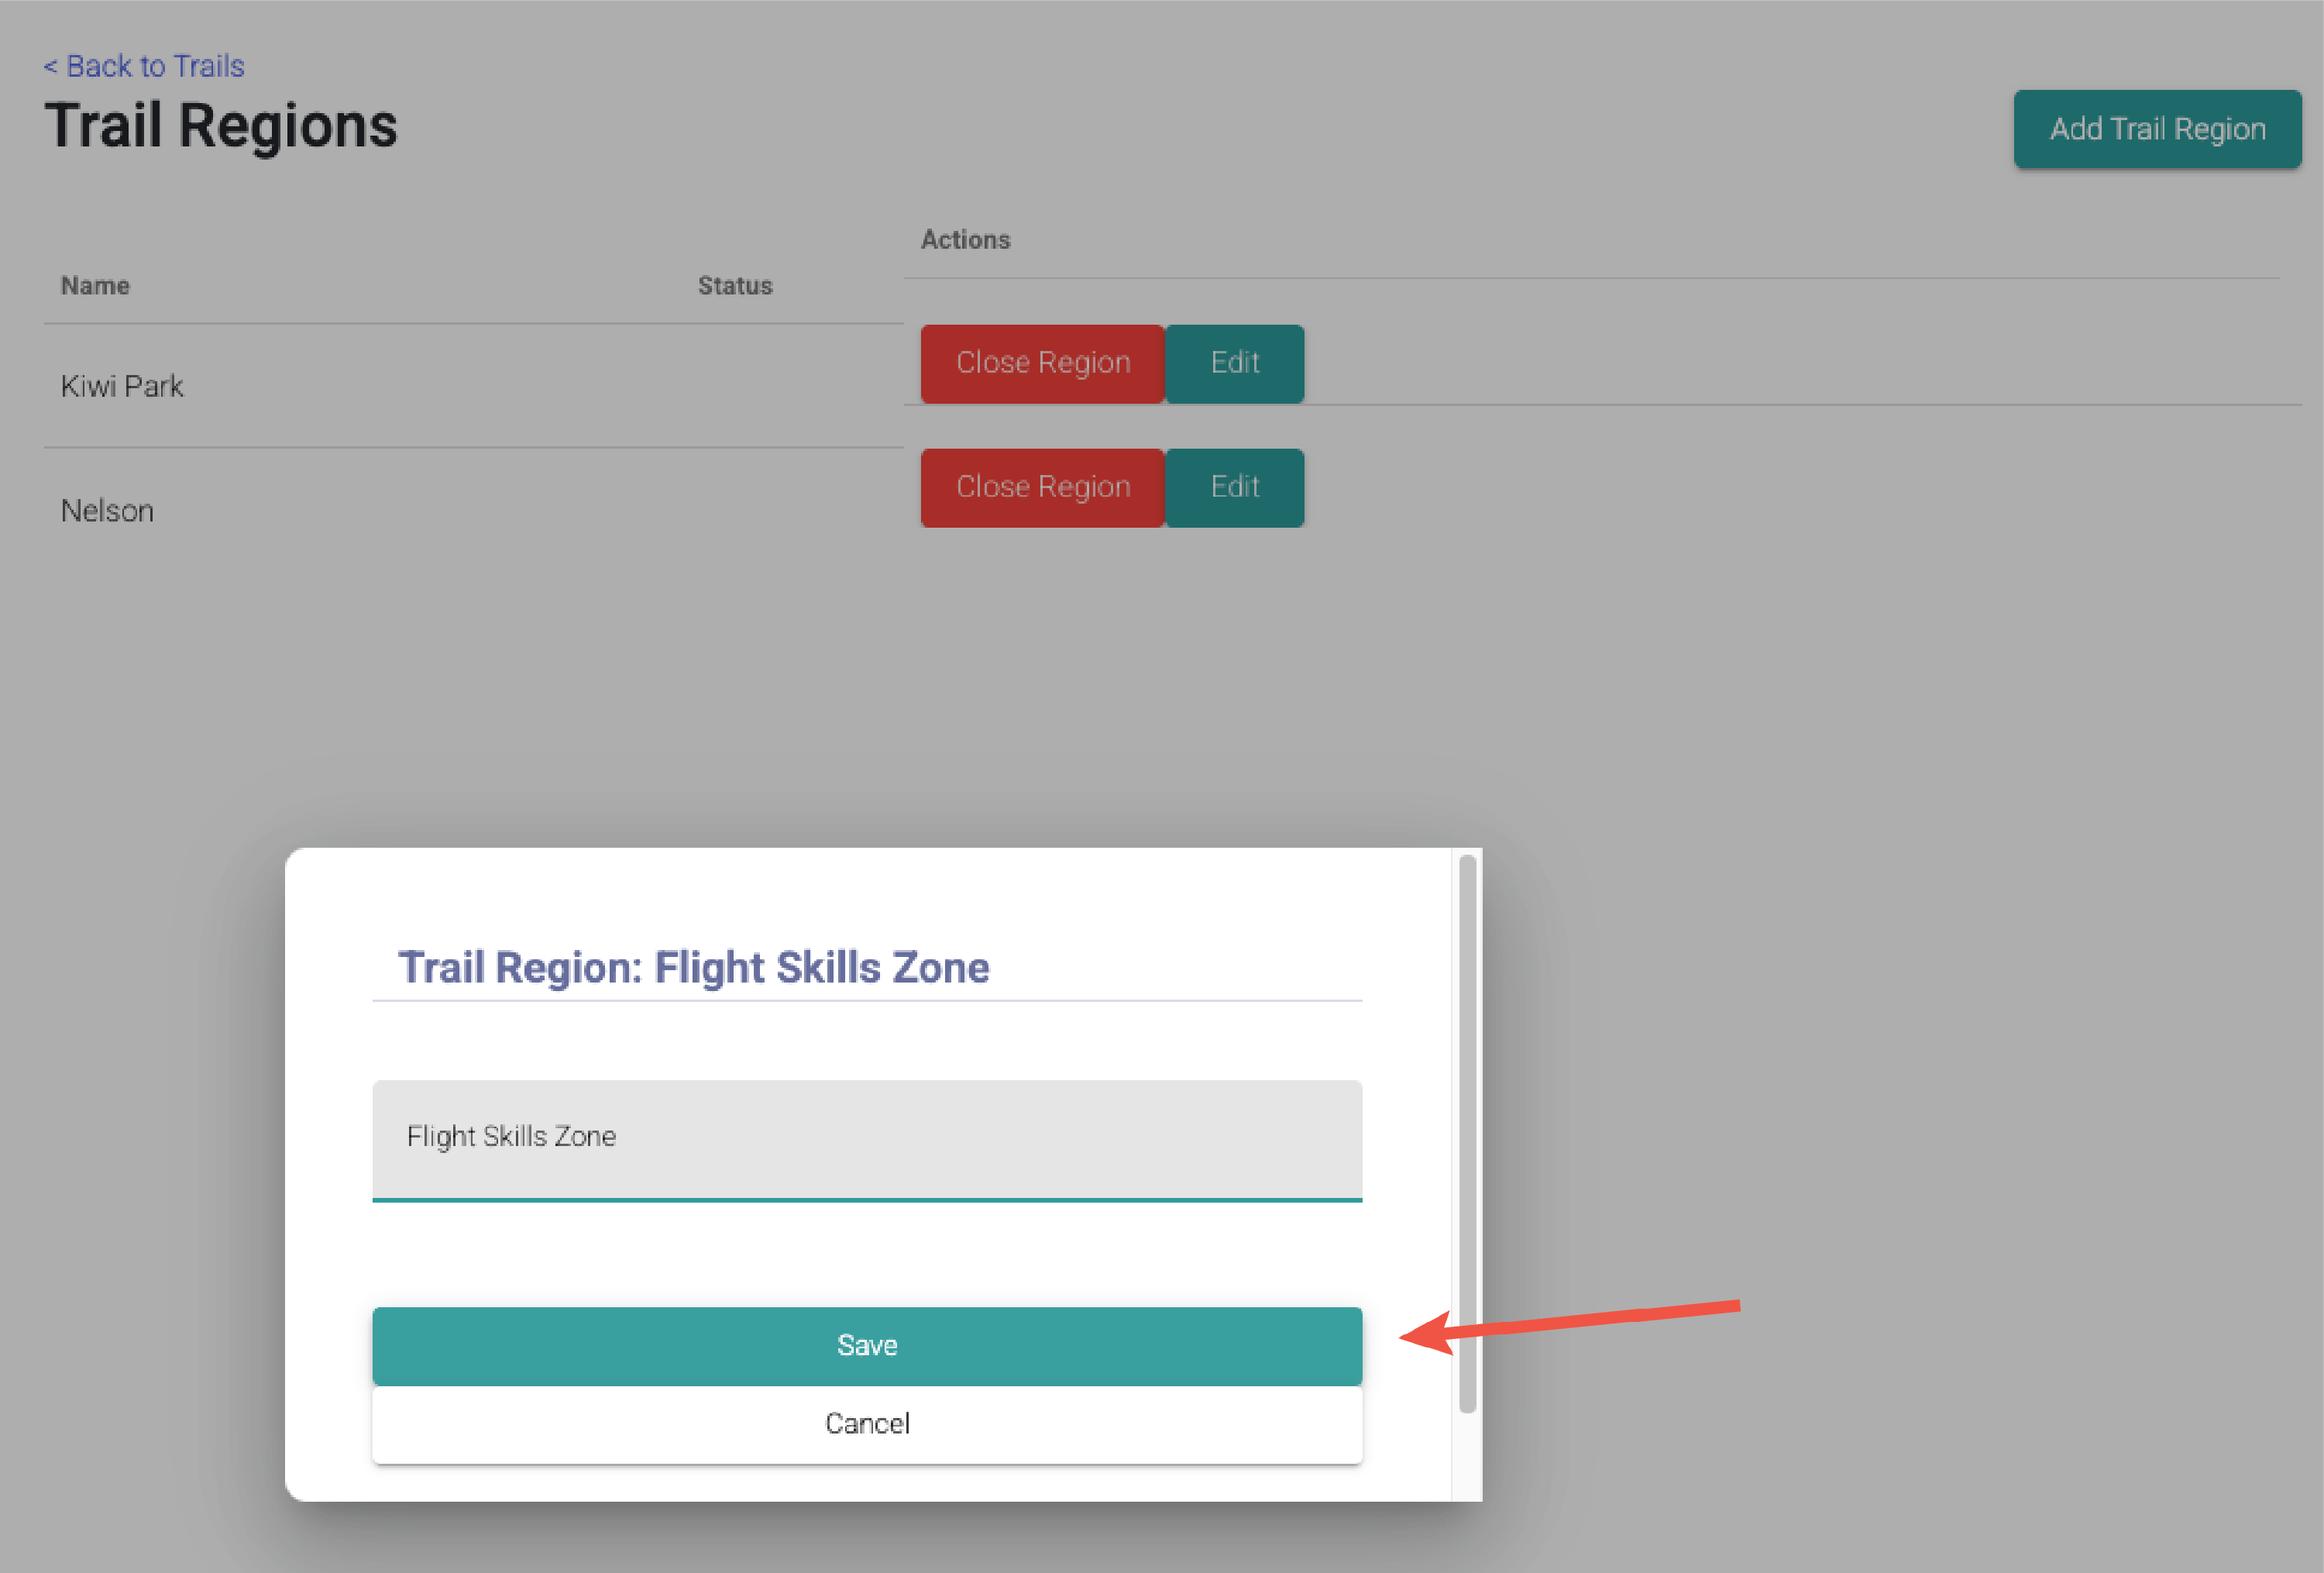
Enter the name of the trail region and select save
- Next, select Add Trail
-
Under the main tab, enter all of the details of your trail;
Name
Description - keep it short and sweet
Select the region from the drop down menu
Add the Status
Any applicable trail status notes
Trail grade
Length in metres
Managed by
-
Save.
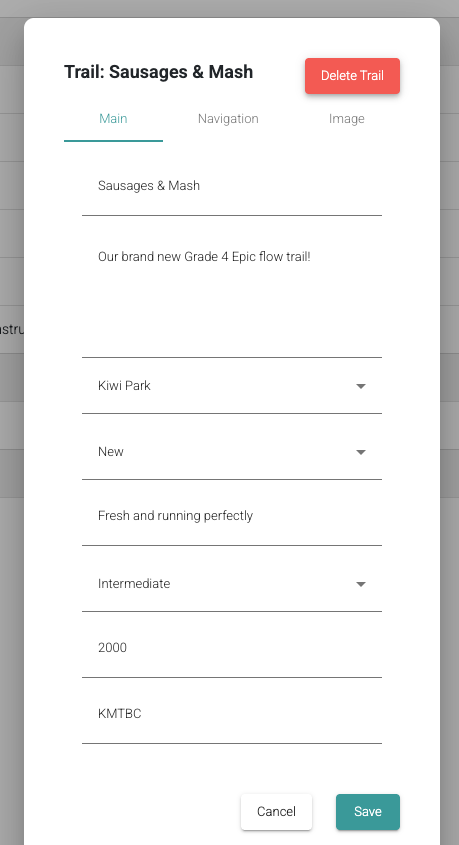
The main tab options
-
Under the Navigation tab;
Click on Generate Trailfork Map URL. This will open up Trailforks in a new browser window, so that you can create a link for your users to click on in-app.
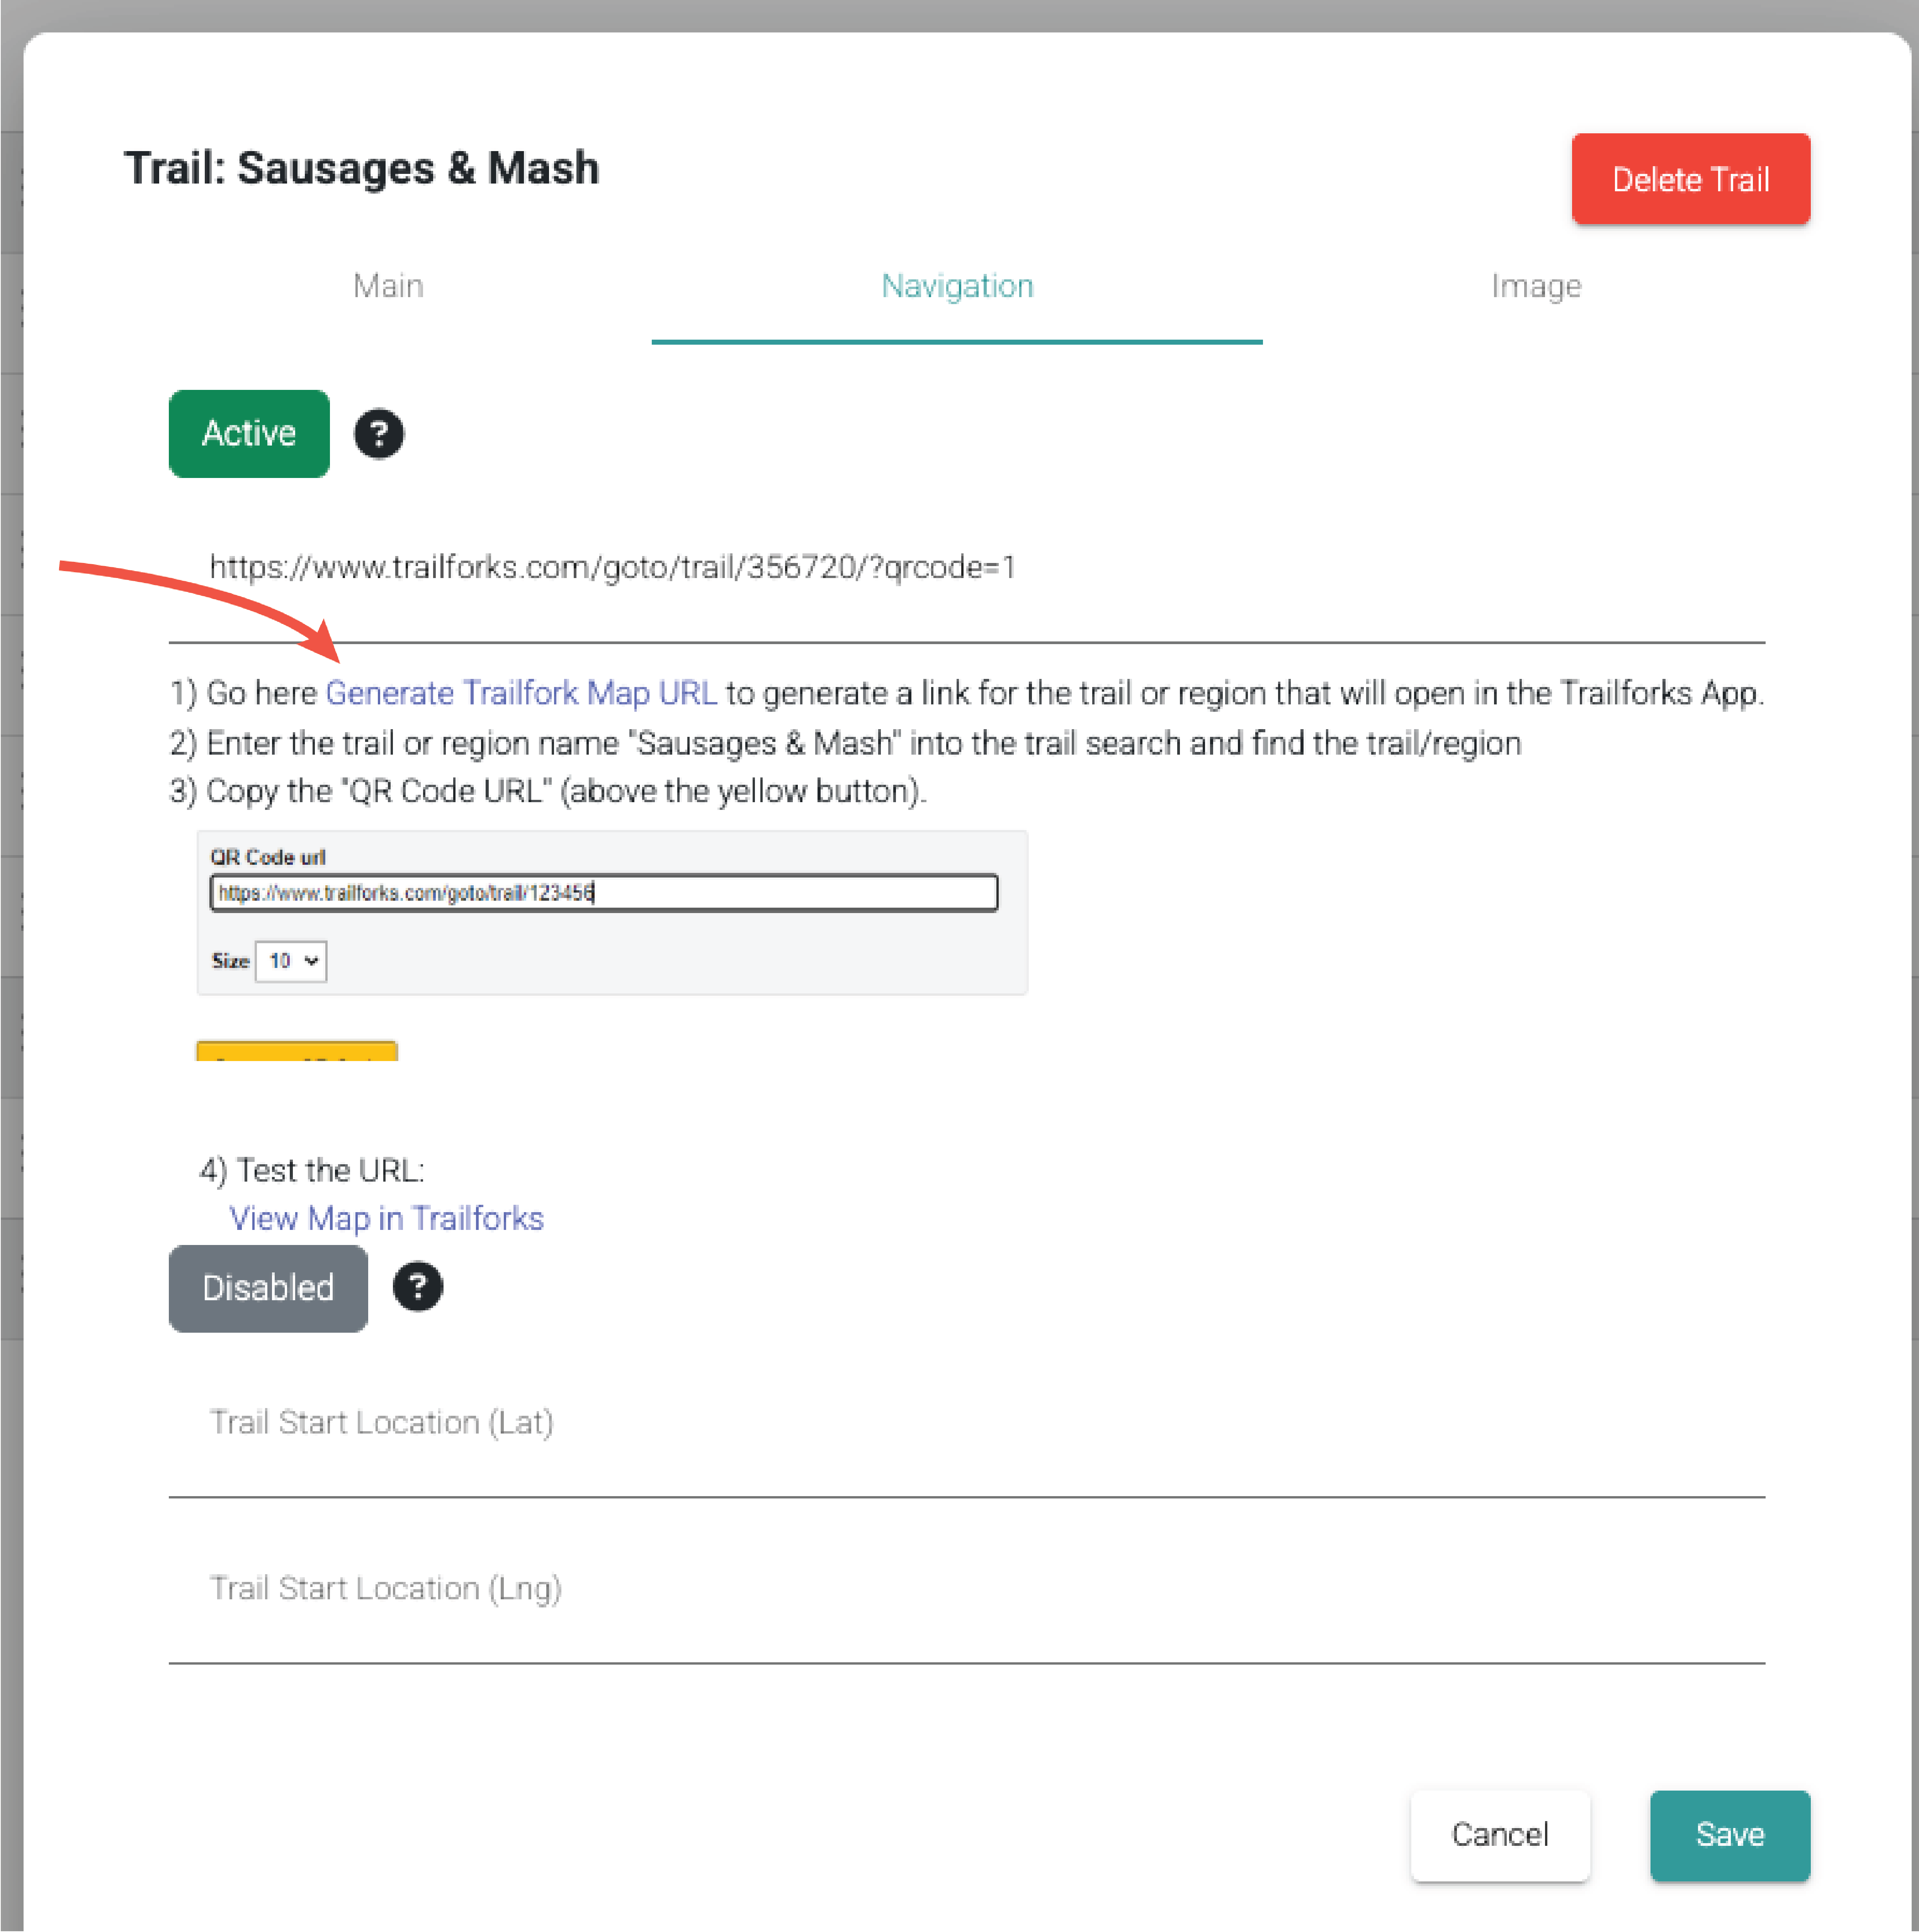
- Search for the trail by name, route or region
- Copy the url and paste this into the Trailforks url field under the Navigation tab
- If the url is correct, a green 'Active' button will show (best to check that the link works)
- Add an image under the Image tab
- Save

- Once the trail is saved, your members will be able to see the new trail in the app and click through to Trailforks if they wish.

⚠️ Updating trail status
Updating a trail status is easy.
- Go to Resources > Trails
- Click on the trail you want to update
- Change the status to one of the preset options: Closed, New, Open, Under Construction
- Add some trail status notes to give your members more information. i.e: 'Essential maintenance this week – back open soon!
- Save.
🔥 The trail status will update automatically in the app.